
How to Burn DVD on a Mac [Easiest Methods]

Last updated on January 31st, 2025 at 6:26 am
Are you looking for a way to save movies on DVD, Blu-ray discs and share them with loved ones?
You are at the right place; we will share steps to burn DVDs on Mac.
Need of Burning Movies to DVD
In pursuit of moving users to iCloud, Apple, for some years now, has been moving away from the DVD and CD drive for some years now. All users do not welcome this strategy, and some still want to burn and play CDs and DVDs on their Mac.
Understanding this, in this post, we will explain how to burn movies to DVD.
Benefits of Burning Movies on a DVD
- Burning movies on your Mac is a good choice for sharing.
- Save disk space occupied by movies saved on Mac.
Now that you know the benefits, let us learn how to burn a movie to DVD on Mac.
- Method 1. The quick and most straightforward solution for burning movies to DVD on Mac
- Method 2. Free solution to burn movies to DVD on Mac
- Method 3. The direct method to burn movies to DVD with Finder
Method 1. Easiest Way for burning movies to DVD on Mac.
To burn a movie to DVD on Mac, we recommend using Wondershare UniConverter, powerful software that allows burning movies and other videos to DVD.
You can customize, edit, trim, crop, add subtitles and burn movies to DVD using free menu templates provided by Wondershare Uniconvertor.
Wondershare UniConverter
- Burn movies, HD videos, and more on DVD without compromising the quality.
- Burn ISO image file or DVD folder to Movies.
- Different static and dynamic free DVD menu templates.
- Customizable DVD settings.
- Real-time preview and 90X faster DVD burning speed.
- The built-in video editor.
- Batch DVD video conversion.
- Burn downloaded movies & recorded movies to DVD.
- Versatile toolbox
- Supported OS: Windows & Mac.
How to burn a movie to DVD?
Step 1
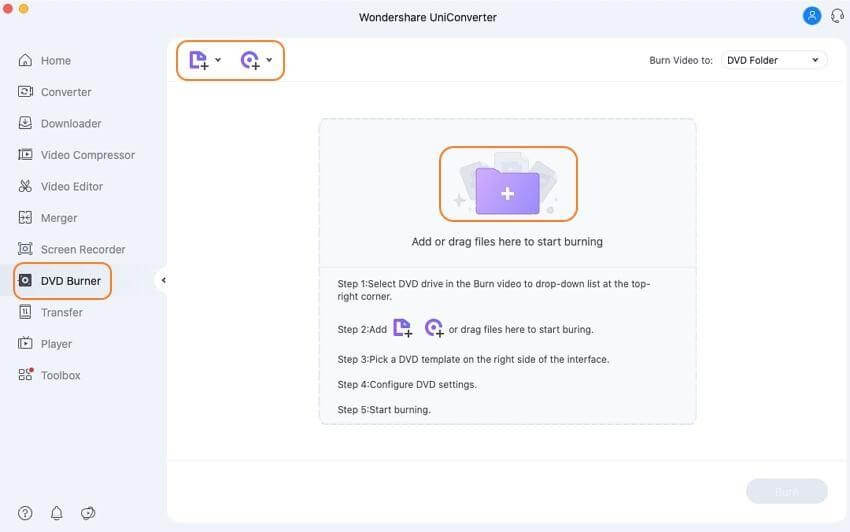
Download, install and launch Wondershare UniConverter. Click browse and add movies or drag and drop movies into the converter.
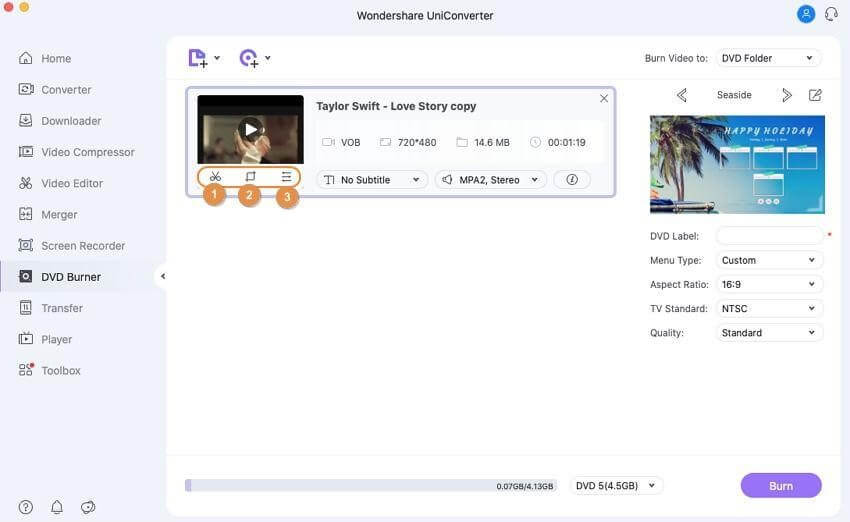
If you want to cut, crop, or trim a specific part of a movie before burning it to DVD, this is the step for you. To edit, click the desired editing icon under the thumbnail image.
However, if you don’t want to edit the movie, you can skip this step.
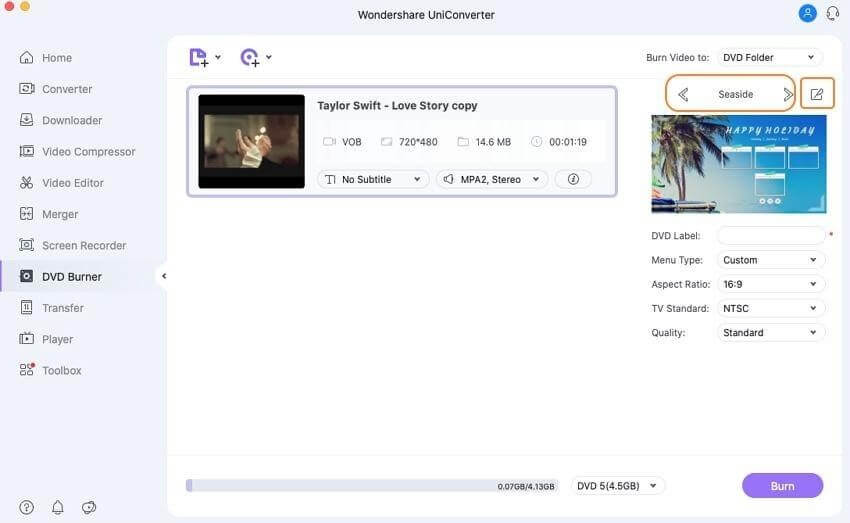
Select DVD template for movies from the right panel. Next, click the edit icon next to the template design name and open the Template window.
Step 4
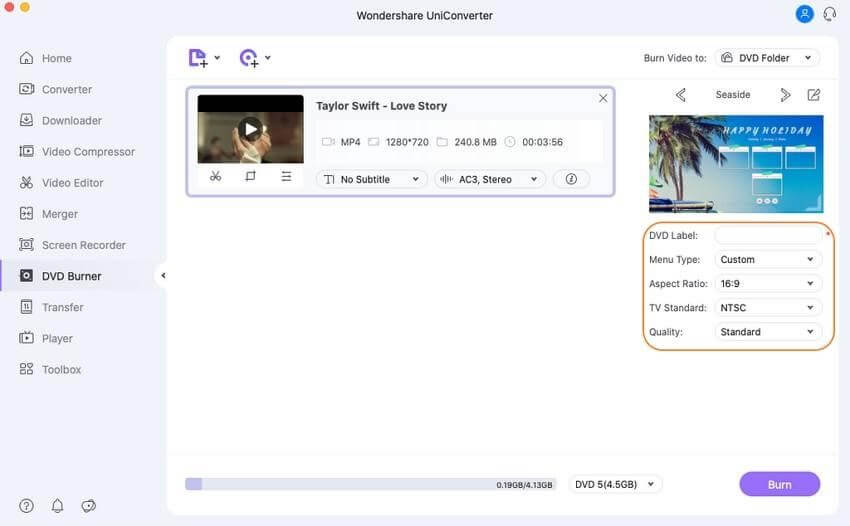
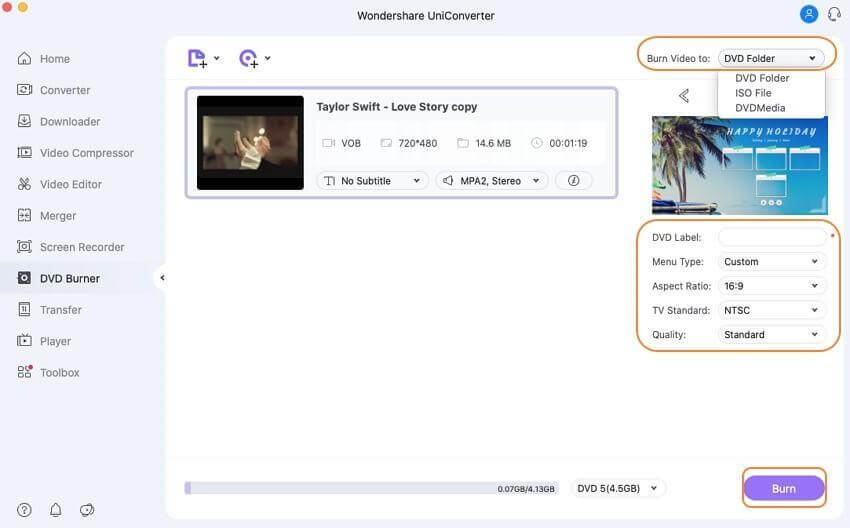
Give DVD a label and select related parameters like TV standard, quality, aspect ratio, and menu types.
Step 5
Next, click the top-right corner > Burn Video tab > select the location where you want to burn the movie files. Insert a blank disk and hit the Burn button.
Method 2. Burning a movie to DVD with Finder.
If you do not want to use a third-party software to burn DVD, Mac offers a direct method to burn a movie to DVD. To use this method, your Mac needs to have either a built-in optical drive or an option to connect an external drive.
Steps on how to burn a movie to DVD on Mac directly:
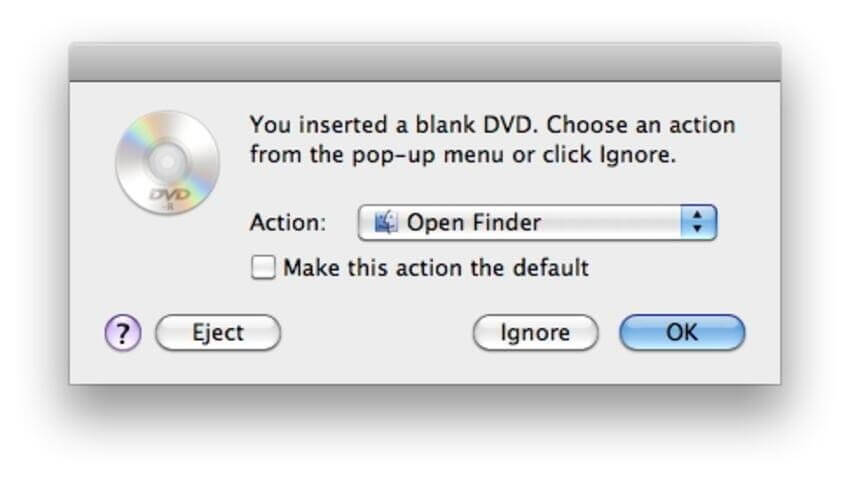
Step 1: Insert a blank disc into your Mac. Open Finder. This will show the disc on the Mac desktop.
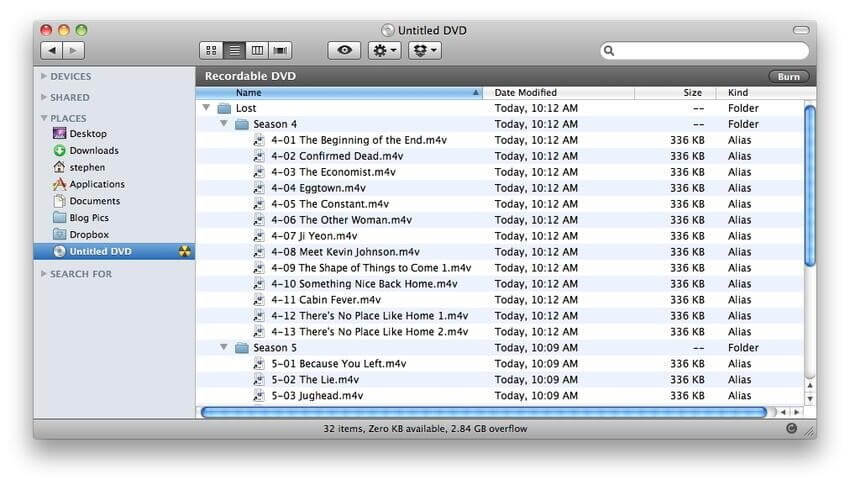
Step 2: Double-click on the disc; you will now see an entry with an Untitled DVD. Drag and drop the movies you want to burn. Arrange the files and rename them if required.
Step 3: Select the Disc Name tab, and name the DVD.
Step 4: Click Burn speed and select other options.
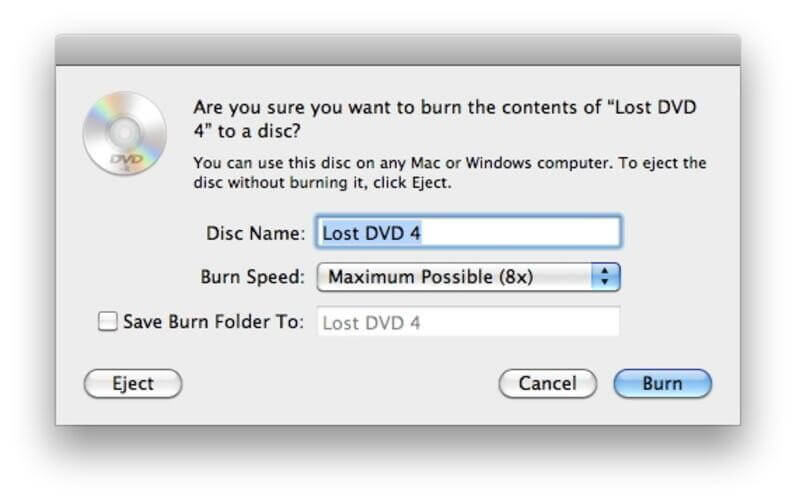
Step 5: Lastly, click Burn & start the burning process.
Part 2. Free solution to burn movies to DVD on Mac.
If you are looking for a free Mac burn DVD movie solution, Burn software is a decent choice. Using this program, you can burn movies, music, data, and other videos to a disc. The interface of the software is simple and intuitive that makes it easy for non-techy users as well.
Key features:
- Allows creating decent quality discs from movies on your Mac.
- Allows creating an audio CD in a few simple steps. Offers advanced options like MP3 tagging and CD-text.
- Allows creating interactive menus by selecting a theme or creating your own as needed.
- Copy one disc to another or use disk images to create a DVD.
- Convert video and audio files to disc compatible format.
Additional Method – Burning movies to DVD on Mac using Burn:
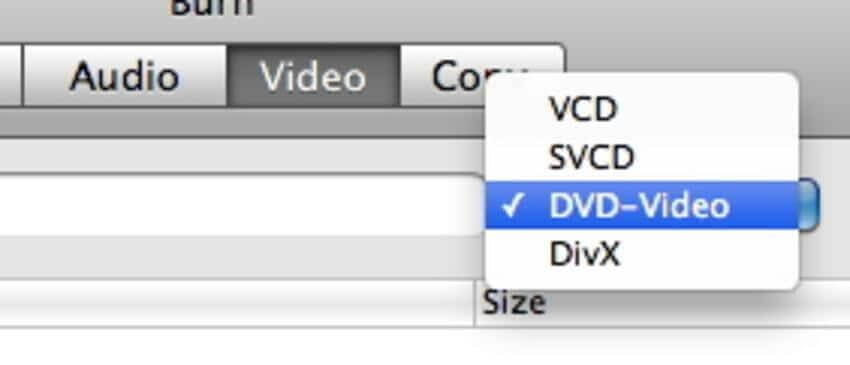
Step 1: Download, install and launch the Burn program. Click the Video tab, and select the DVD-Video option from the drop down menu.
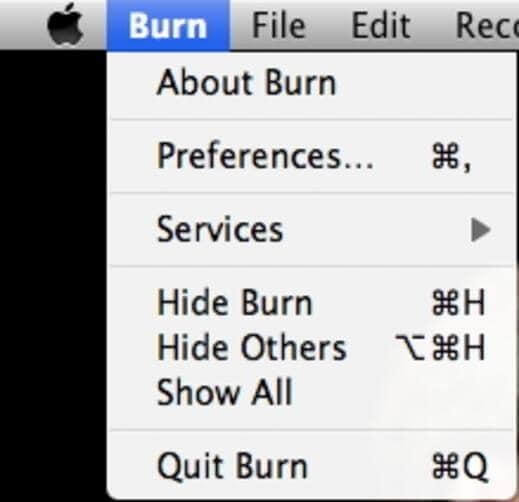
Step 2: Click the Burn menu to open Preferences. Click the Video tab > select NTSC or PAL from the Region settings.
If you want to preview the file click the Preview button present on the bottom of the preference window.
Step 3: To add the movie click + from the main window. To start the process click Convert > select the location to save the file.
Since Burn is a basic tool you will only get to use limited features. Also compared to UnivConvertor its speed is slower.
Conclusion
Using these simple steps and the amazing tool like Wondershare UniConvertor, you can quickly burn movies to DVD. If you want to burn CDs with themes and customize things use the Wondershare tool. However, you can go with the manual steps if you don’t want to spend on a DVD burning tool.
Do let us know which method you picked and your experience in the comments section.
Author Bio:
Dinesh Lakhwani 

Dinesh Lakhwani, the entrepreneurial brain behind “TechCommuters,” achieved big things in the tech world. He started the company to make smart and user-friendly tech solutions. Thanks to his sharp thinking, focus on quality and the motto of never giving up, TechCommuters became a top player in the industry. His commitment to excellence has propelled the company to a leading position in the industry.
Popular Post

Recent Post
How To Get More Storage On PC Without Deleting Anything [2025]
Running out of space on your PC is frustrating. You might think deleting files is the only way. But that’s not true. There are many ways to get more storage without losing your important data. Learning how to get more storage on PC can save you time and stress. These methods work well and keep […]

How To Speed Up An Old Laptop [Windows 11/10]: Complte Guide
Is your old laptop running slowly? You’re not alone. Many people face this issue as their computers age. Learning how to speed up an old laptop is easier than you think. Over time, older laptops tend to slow down for a variety of reasons. Fortunately, with a few smart tweaks, you can significantly boost their […]
How To Reset Your PC For A Fresh Start In Windows 11/10 [2025]
Is your Windows computer lagging or behaving unpredictably? Are you constantly dealing with system errors, crashes, or sluggish performance? When troubleshooting doesn’t help, performing a full reset might be the most effective way to restore stability. Resetting your PC clears out all installed applications, personal files, and custom settings. It restores the system to its […]

How To Adjust Display Brightness Settings Easily in Windows [2025]
If your screen is overly bright or dim, it can strain your eyes and make tasks uncomfortable. Fortunately, Windows offers simple tools to fine-tune your display brightness. Despite how easy it is, many users aren’t aware of these quick fixes. Windows has many built-in tools to help you. You can change brightness with just a […]
How to Uninstall Problematic Windows Updates Easily [2025]
Learn how to uninstall problematic Windows updates easily. 5 proven methods to fix crashes, boot issues & performance problems. Simple step-by-step guide.
15 Most Essential Windows 11 Privacy And Security Settings [2025]
Learn 15 essential Windows 11 privacy and security settings to protect your data. Master computer privacy settings with simple steps to manage privacy settings effectively.
Rename Your Device For Better Security Windows [Windows 11 & 10]
Learn to rename your device for better security Windows 11 & 10. Simple steps to protect your computer from hackers. Improve privacy and security now.

How To Adjust Display Appearance Settings Easily in Windows 11/10
Learn to adjust display appearance settings easily Windows offers. Simple guide covers brightness, scaling, resolution & multi-monitor setup for better screen experience.

Supercharge Your Productivity: A Solopreneur’s and SMB’s Guide to Mastering Google Workspace with Gemini’
Picture this. It’s Monday morning. You open your laptop. Email notifications flood your screen. Your to-do list has 47 items. Three clients need proposals by Friday. Your spreadsheet crashed yesterday. The presentation for tomorrow’s meeting is half-finished. Sound familiar? Most small business owners live this reality. They jump between apps. They lose files. They spend […]
9 Quick Tips: How To Optimize Computer Performance
Learn how to optimize computer performance with simple steps. Clean hard drives, remove unused programs, and boost speed. No technical skills needed. Start today!