How to Fix “iMessage Not Delivered” on your iPhone
Last updated on January 11th, 2025 at 5:21 am
Introduction:
Are you experiencing the frustrating issue of “iMessage Not Delivered” on your iPhone? It’s a common problem that can hinder your ability to send messages and disrupt your communication flow. Whether you’re trying to connect with friends, family, or colleagues, resolving this issue is crucial for staying connected in the digital age.
In this troubleshooting guide, we’ll walk you through some effective solutions to fix the “iMessage Not Being Delivered” problem on your iPhone. By following these steps, you’ll be able to regain seamless communication through iMessage and ensure your messages reach their intended recipients.
How to Fix the “iMessage Not Delivered” Issue on iPhone?
Solution 1: Check Your Internet Connection
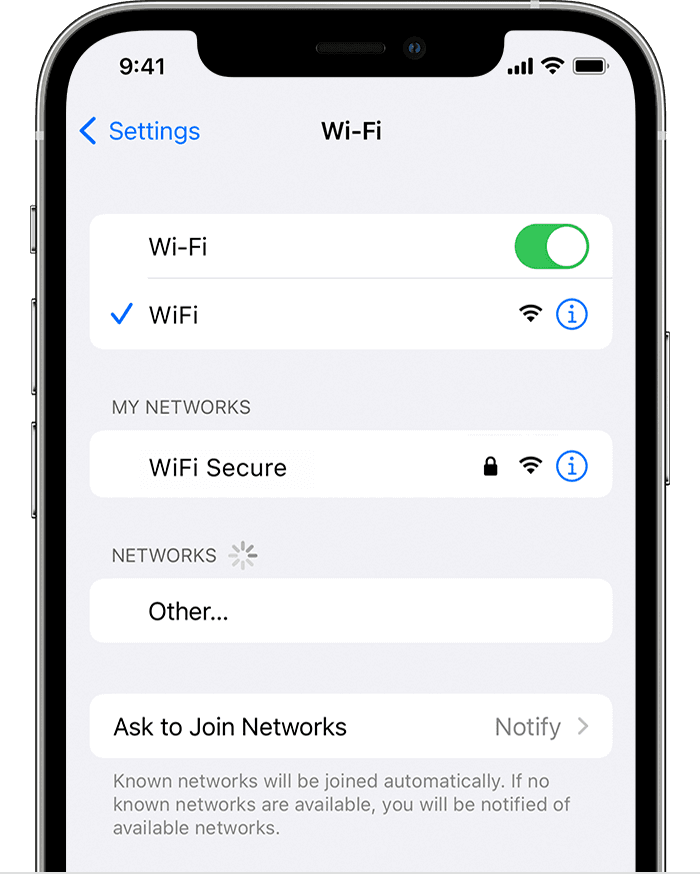
The first and foremost step in resolving the issue is to ensure that you have a stable and reliable internet connection. Poor connectivity can often be the root cause of message delivery problems.
Therefore, it is crucial to verify that you are connected to a robust Wi-Fi network or have a strong cellular data signal. A stable internet connection will pave the way for seamless communication and increase the chances of successfully delivering your iMessages.
Solution 2: Manually Enable iMessage
If you’re still encountering the “iMessage Not Delivered” problem on your iPhone, it may be worth checking if iMessage is enabled. Sometimes, a simple toggle of this feature can resolve the issue. Follow these steps to manually enable iMessage:
- Open the Settings app on your iPhone. Scroll down and tap on “Messages”.
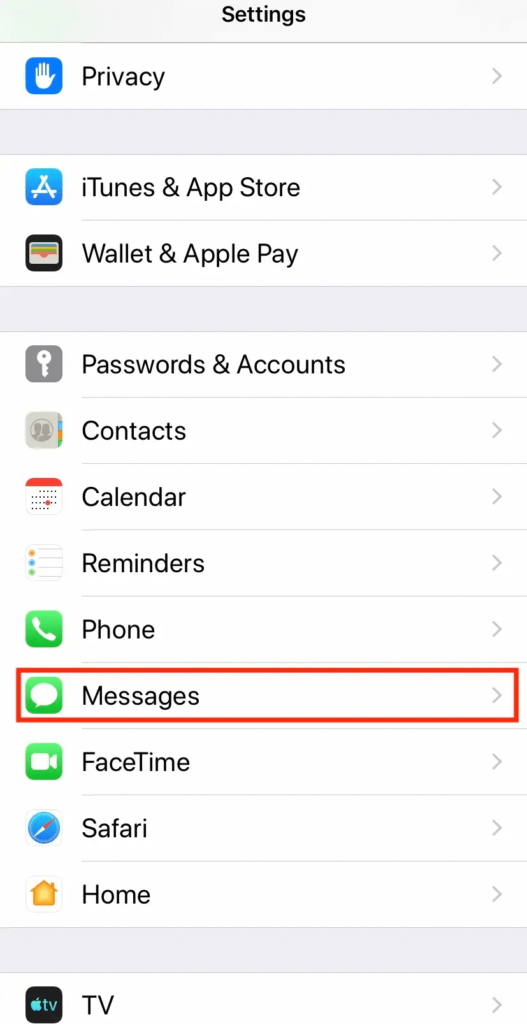
- Ensure that the toggle switch next to “iMessage” is turned on (green).
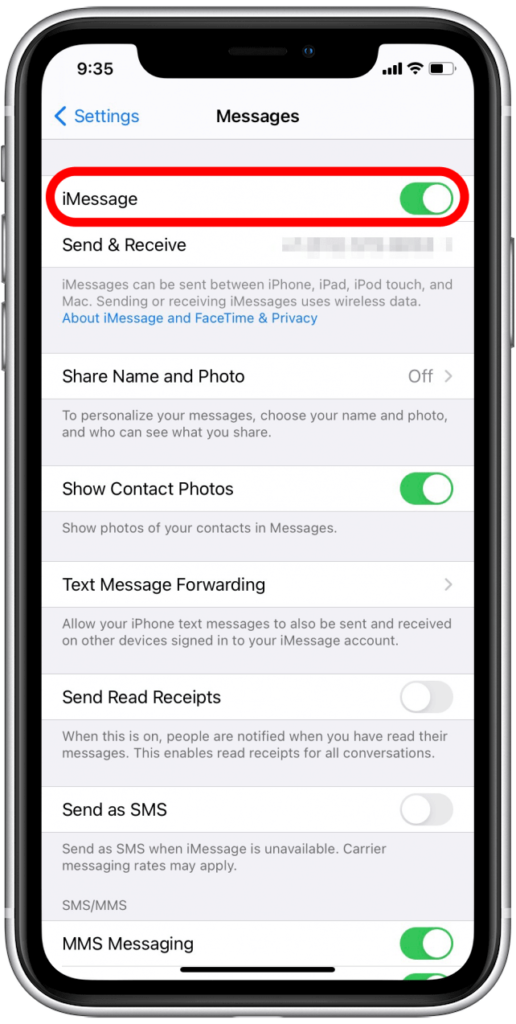
- If iMessage is already enabled, toggle it off and wait for a few seconds before toggling it back on.
By manually enabling iMessage, you’re essentially refreshing the feature and giving it a chance to establish a stable connection. This step often helps in rectifying any temporary glitches or conflicts that may have caused the problem.
Once you’ve enabled iMessage, try sending a test message to see if the issue is resolved. If the problem persists, let’s move on to the next solution.
Solution 3: Send as a Text Message Instead
If you’re still facing the “iMessage Not Delivered” issue on your iPhone, an alternative approach is to send your message as a regular text message instead of using iMessage. Follow these steps to send a text message:
- Open the Messages app on your iPhone.
- Tap on the conversation where you’re experiencing the delivery problem.
- Type your message as you normally would.
- Instead of tapping the blue send button, press and hold it until a menu appears.

- From the menu, select “Send as Text Message.”
By opting to send your message as a text message, you bypass the iMessage feature and use the traditional SMS method instead. This can be helpful in situations where iMessage encounters temporary connectivity issues or if the recipient’s device does not support iMessage.
Solution 4: Perform a Force Restart
If you’re still facing the iMessage delivery problem on your iPhone, performing a force restart can help refresh the device’s system and potentially resolve any software-related issues causing the problem. Here’s how you can do it:
For iPhone models without a Home button (iPhone 7 and later):
- Press and hold the Power button (Sleep/Wake button) and the Volume Down button simultaneously.
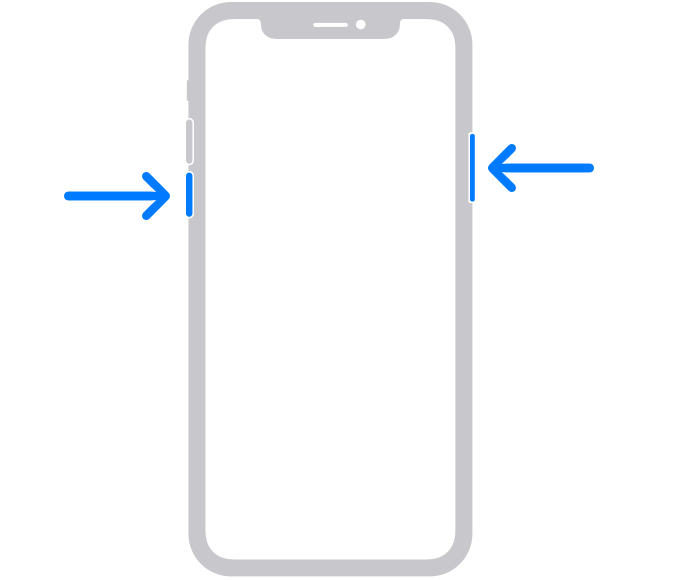
- Keep holding both buttons until the Apple logo appears on the screen.
- Release the buttons and wait for your iPhone to restart.
Performing a force restart can help clear temporary system glitches that might be causing the iMessage delivery problem. After your iPhone restarts, try sending an iMessage to check if the issue is resolved.
Solution 5: Log Out and Login Your Apple ID Account
Here comes our next solution. Well, agree or not but it’s worth trying to log out and log back into your Apple ID account. This process can help refresh your account settings and resolve any authentication-related problems.
Follow these steps to log out and log back into your Apple ID:
- Open the Settings app on your iPhone.
- Tap on your Apple ID profile at the top of the screen.
- Scroll down and select “Sign Out” at the bottom of the page.
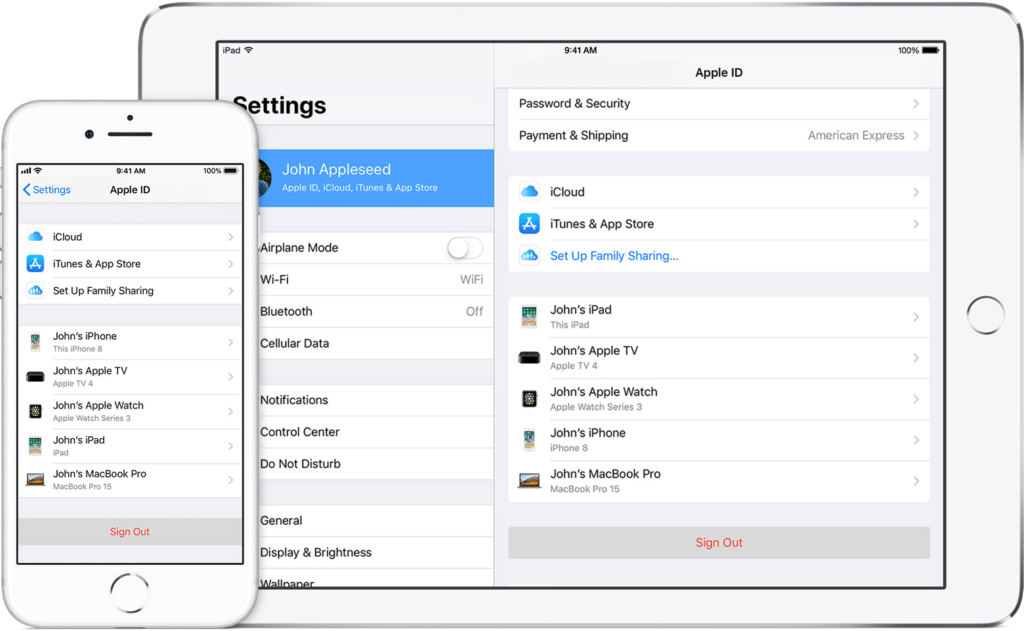
- Enter your Apple ID password when prompted and confirm the sign-out process.
- Once signed out, go back to the Settings app.
- Tap on “Sign In” or “Sign in to your iPhone” (depending on your iOS version).
- Enter your Apple ID and password, and follow the on-screen instructions to sign back in.
Logging out and logging back into your Apple ID account can reestablish the necessary connection between your device and Apple’s servers, potentially resolving any underlying issues causing the message delivery problem.
Solution 6: Try Using an Alternative SIM Card
Trying an alternative SIM card can help determine if the problem is specific to your current SIM. Using an alternative SIM card can help identify whether the issue is related to your original SIM card or the iPhone itself. If the “iMessage Not Delivered” problem is resolved with the alternative SIM card, it suggests that there may be an issue with your original SIM card. In such cases, you can contact your mobile service provider to address the SIM-related issue.
If the problem persists even with the alternative SIM card, it indicates that the issue is likely not SIM card-related, and you should proceed with other troubleshooting methods or consider seeking assistance from Apple Support.
Solution 7: Update iOS
It is quite essential to ensure that your device is running the latest version of iOS. Software updates often include bug fixes and improvements that can address known issues, including messaging-related problems.
Here’s how you can update your iOS:
- Connect your iPhone to a stable Wi-Fi network.
- Open the Settings app on your iPhone.
- Scroll down and tap on “General.”
- Select “Software Update.”
- If an update is available, tap on “Download and Install.”
- If prompted, enter your device passcode.
- Follow the on-screen instructions to complete the update process.
In addition to this, it’s recommended to have your iPhone connected to a power source during the update to ensure a smooth installation. Once the update is complete, try sending an iMessage to check if the issue is resolved.
Solution 8: Reset Your iPhone
If all the previous solutions have failed to resolve the iMessage delivery problem on your iPhone, performing a reset may be the final step to consider. Resetting your iPhone can help eliminate any persistent software issues that might be causing the problem. However, please note that resetting your device will erase all data and settings, so it’s crucial to back up your iPhone beforehand.
Here’s how you can reset your iPhone:
- Go to the Settings app on your iPhone.
- Scroll down and tap on “General.”
- Scroll to the bottom and select “Reset.”
- Choose “Erase All Content and Settings.”
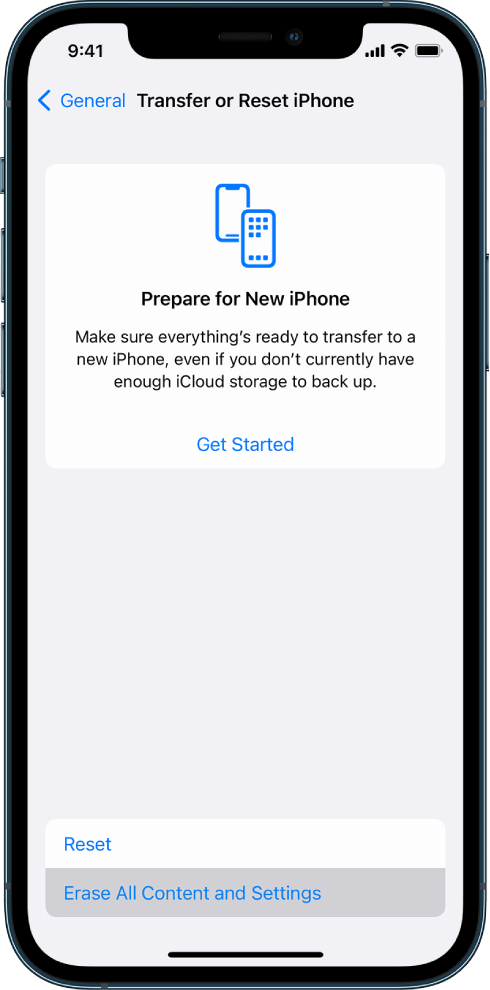
- If prompted, enter your device passcode and confirm your decision.
- Follow the on-screen instructions to proceed with the reset process.
After the reset is complete, set up your iPhone as a new device or restore it from a backup. Once you’ve completed the setup, test sending an iMessage to check if the issue has been resolved.
Resetting your iPhone should only be done as a last resort if all other troubleshooting methods have failed. If the problem still persists even after resetting your device, it’s advisable to contact Apple Support or visit an Apple Store for further assistance.
Conclusion
Dealing with the frustrating “iMessage Not Delivered” error on your iPhone can be quite a headache, but thankfully there are several effective solutions to help you resolve this issue. It’s worth noting that technology is constantly evolving, and occasional glitches are not uncommon. By following the troubleshooting steps mentioned in this blog, you can regain the seamless messaging experience without any hurdles.
Author Bio:
Dinesh Lakhwani 

Dinesh Lakhwani, the entrepreneurial brain behind “TechCommuters,” achieved big things in the tech world. He started the company to make smart and user-friendly tech solutions. Thanks to his sharp thinking, focus on quality and the motto of never giving up, TechCommuters became a top player in the industry. His commitment to excellence has propelled the company to a leading position in the industry.
Popular Post


Recent Post

How To Get More Storage On PC Without Deleting Anything [2025]
Running out of space on your PC is frustrating. You might think deleting files is the only way. But that’s not true. There are many ways to get more storage without losing your important data. Learning how to get more storage on PC can save you time and stress. These methods work well and keep […]

How To Speed Up An Old Laptop [Windows 11/10]: Complte Guide
Is your old laptop running slowly? You’re not alone. Many people face this issue as their computers age. Learning how to speed up an old laptop is easier than you think. Over time, older laptops tend to slow down for a variety of reasons. Fortunately, with a few smart tweaks, you can significantly boost their […]

How To Reset Your PC For A Fresh Start In Windows 11/10 [2025]
Is your Windows computer lagging or behaving unpredictably? Are you constantly dealing with system errors, crashes, or sluggish performance? When troubleshooting doesn’t help, performing a full reset might be the most effective way to restore stability. Resetting your PC clears out all installed applications, personal files, and custom settings. It restores the system to its […]

How To Adjust Display Brightness Settings Easily in Windows [2025]
If your screen is overly bright or dim, it can strain your eyes and make tasks uncomfortable. Fortunately, Windows offers simple tools to fine-tune your display brightness. Despite how easy it is, many users aren’t aware of these quick fixes. Windows has many built-in tools to help you. You can change brightness with just a […]
How to Uninstall Problematic Windows Updates Easily [2025]
Learn how to uninstall problematic Windows updates easily. 5 proven methods to fix crashes, boot issues & performance problems. Simple step-by-step guide.

15 Most Essential Windows 11 Privacy And Security Settings [2025]
Learn 15 essential Windows 11 privacy and security settings to protect your data. Master computer privacy settings with simple steps to manage privacy settings effectively.
Rename Your Device For Better Security Windows [Windows 11 & 10]
Learn to rename your device for better security Windows 11 & 10. Simple steps to protect your computer from hackers. Improve privacy and security now.

How To Adjust Display Appearance Settings Easily in Windows 11/10
Learn to adjust display appearance settings easily Windows offers. Simple guide covers brightness, scaling, resolution & multi-monitor setup for better screen experience.

Supercharge Your Productivity: A Solopreneur’s and SMB’s Guide to Mastering Google Workspace with Gemini’
Picture this. It’s Monday morning. You open your laptop. Email notifications flood your screen. Your to-do list has 47 items. Three clients need proposals by Friday. Your spreadsheet crashed yesterday. The presentation for tomorrow’s meeting is half-finished. Sound familiar? Most small business owners live this reality. They jump between apps. They lose files. They spend […]

9 Quick Tips: How To Optimize Computer Performance
Learn how to optimize computer performance with simple steps. Clean hard drives, remove unused programs, and boost speed. No technical skills needed. Start today!