
How to Install Docker on a Mac?
Last updated on January 24th, 2025 at 5:24 pm
Introduction
In Mac and even Windows computers, the Docker Desktop is a native app from Docker for various purposes, like launching, debugging, building, and testing containerized apps.
A wide range of features are available within this app, made to simplify the setup and monitoring processes of the isolated environments where the projects are available. The software ensures that all available dependencies do not conflict with each other, either.
Overall, users can expect many functional benefits from installing Docker for Mac, and the process of that is simple. Let’s discuss how that occurs.
What is Docker Desktop?
The Docker Desktop is a desktop app for Mac and Windows computers that are useful for debugging, creating, and testing containerized apps. Various features are available within the utility for its functions, like fast edit-test cycles, built-in compatibility for enterprise networks, file change alerts, etc.
While some VPNs like Avast SecureLine VPN work well on their own, you can run other VPNs and proxies with the support of this software too. Under this program, users will find different options like Kubernetes, developer tools, the Docker app, and version synchronization.
What is Containerized Apps?
The Containerized applications are cleanly packaged small bundles of software. These apps include multiple software sections that can work together for specific functions, all of them available within these singular self-contained boxes.
These containerized apps work for different user types, like businesses get many apps within these applications, easily operable with one server. This will exert little stress on different hardware in the system. Alternately, app developers can program specific codework for app development, carry them in the containerized apps and later run them in other systems.
From the end users’ perspectives, these apps are useful for storing many files in one app instead of different sections of the hard drive.
System Requirements on Mac Devices for Docker
It is possible to download and install Docker on Mac on devices running with Apple silicon and Intel-based chipsets equally. However, specific system requirements are important to note:
Mac with Intel chipset
Specifications include:
- macOS version 10.15 or newer versions are compatible, like Catalina, Monterey, and Big Sur.
- At least 4 GB of RAM capacity is required.
If your device running with an Intel chip is of an older macOS version, upgrade the system to a recent macOS version before using Docker.
Mac with Apple Silicon chipset
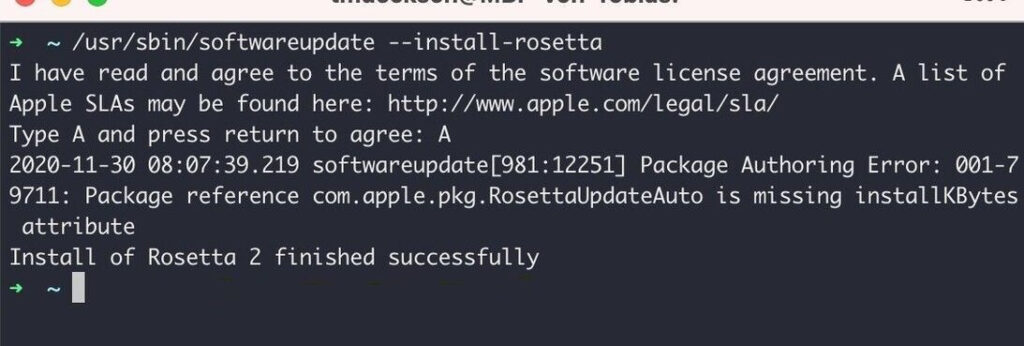
The previous requirement of installing and using Rosetta 2 is not a prerequisite anymore since the launch of Docker Desktop version 4.3.0 and above. However, the software does run some important tools for the optional command line. So, it is better to install Rosetta 2 with the following command:
- softwareupdate –install-rosetta
Ways to Successfully Install Docker on Mac?
In the context of how to install Docker on Mac, there is essentially one simple method to handle the process directly. But, to activate the software or install the new upgrade, users must learn more sequences. Here are the varying processes, discussed in detail.
Method 1: Install Docker Desktop through Mac
The first process of getting and installing Docker for Mac is straightforward and accessible through the Docker official website. Make sure to check for the latest version of the app and then follow the correct steps for downloading.
How to do this?
Step 1: Visit the official website of Docker.
Step 2: Tap the “Install Docker Desktop” option > Install on Mac. Choose the software for your specific chipset and download the latest version of the Docker Desktop app.
Step 3: Access the section in your Mac where files exist after downloading and double-click on the downloaded file.
Step 4: Drag and drop the “docker.dmg” file into the Applications folder.
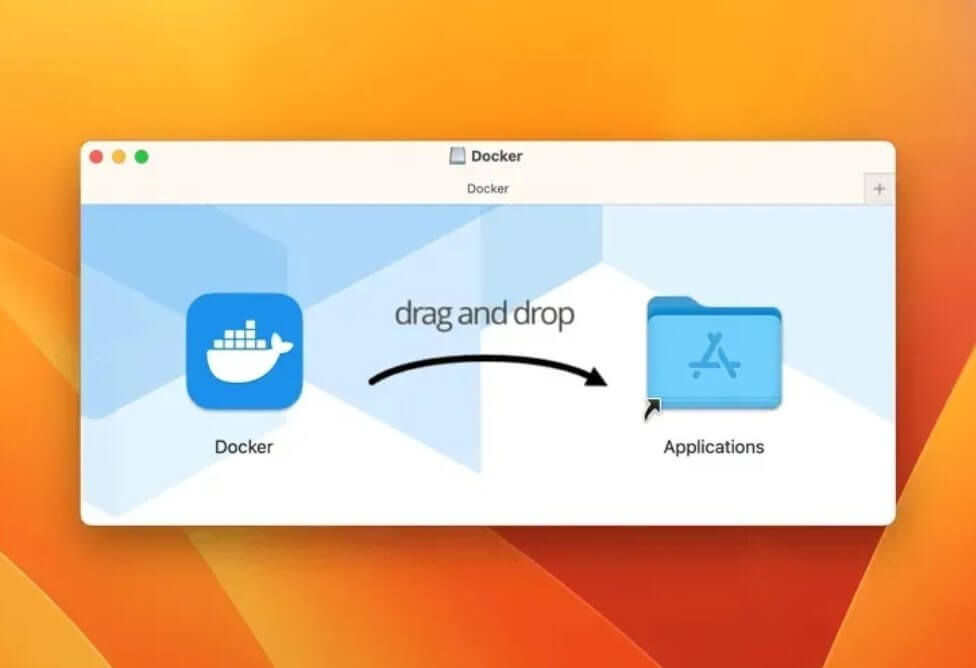
Step 5: Under the Applications folder, open Docker for Mac.
Step 6: When the pop-up prompt comes up, insert the device password to unlock the app.
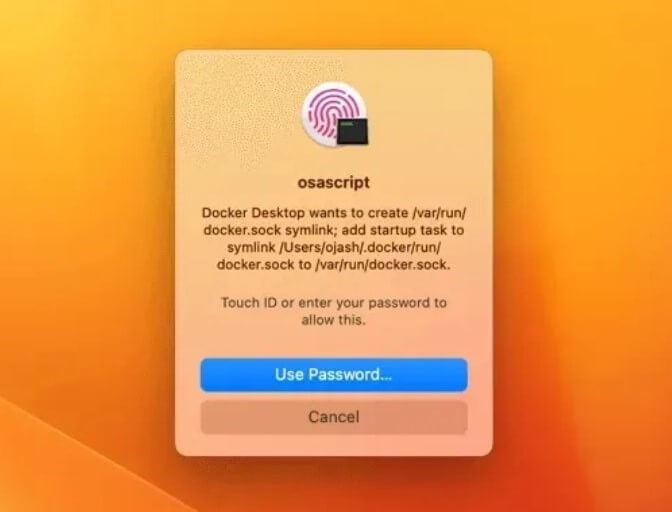
Step 7: The Docker Desktop app will start automatically configuring the device as needed.
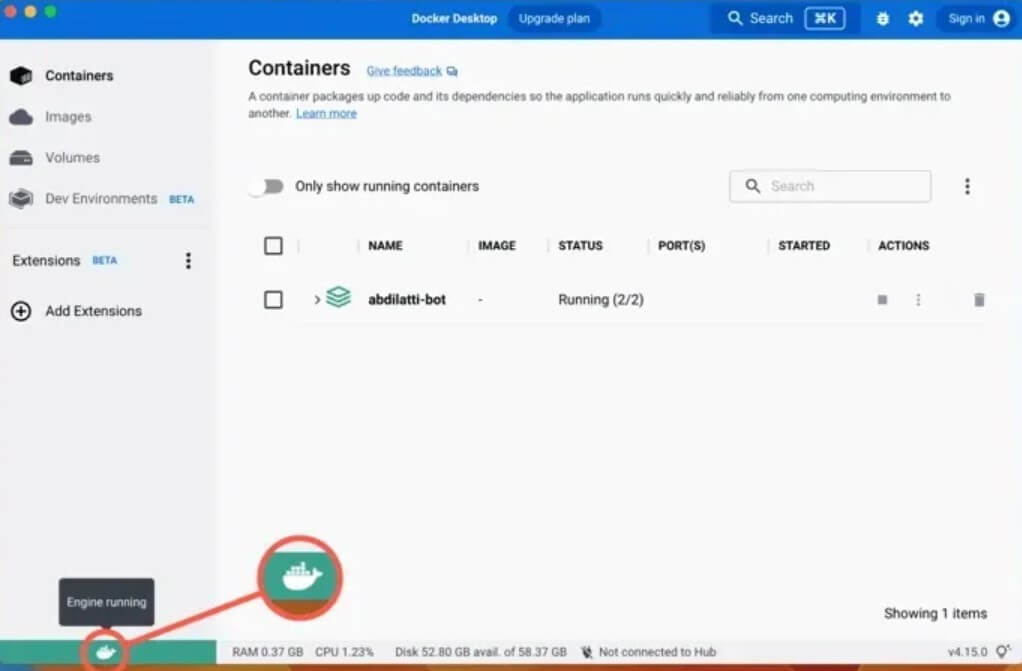
Step 8: Hover the cursor on top of the Docker logo at the bottom-left part of the window. If the “Engine Running” popup appears, it signifies the successful installation process.
Method 2: Verify Docker Desktop on Mac via Terminal
After you install Docker on Mac, it is better to check that the software is running as expected on your device. It is necessary to access the Terminal utility to complete the verification process securely on Mac.
How to do this?
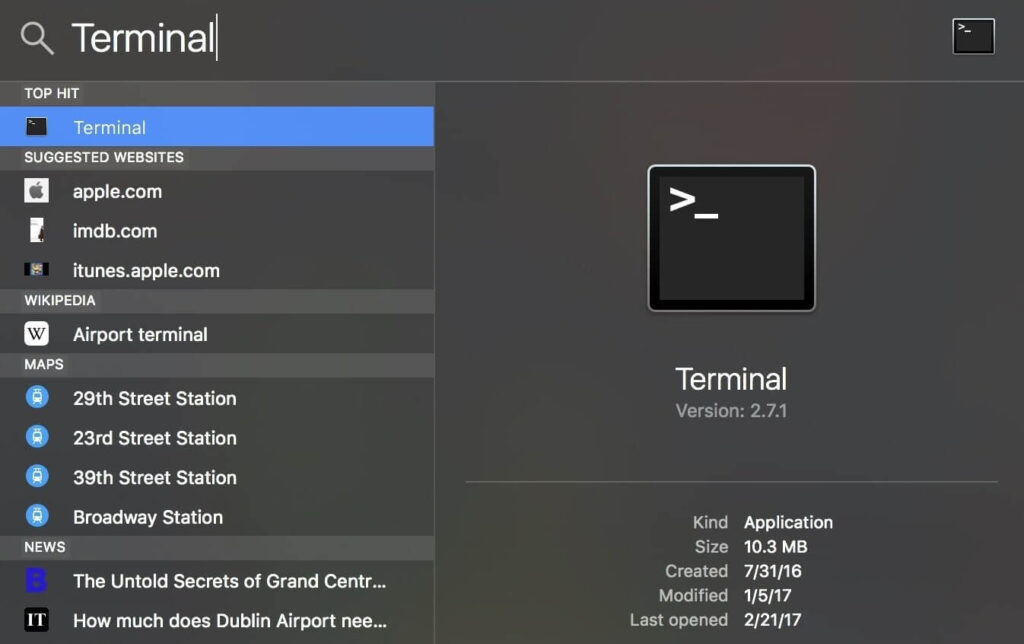
Step 1: On your Mac device, tap the Finder icon and choose Applications > Utilities.
Step 2: Select the Terminal option from the list of apps and access the app.
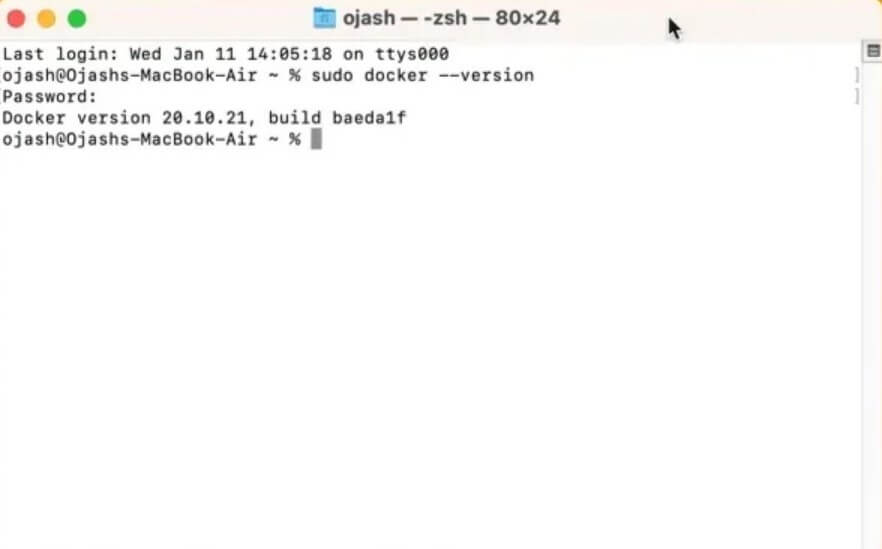
Step 3: Add the following command and hit the Enter key:
sudo docker –version
Step 4: Again, add the next command to verify the compose function > Enter:
sudo docker-compose –version
Step 5: Insert the following command for the installation machine version > Enter:
sudo docker-machine –version
Step 6: You can also check the installation status with the following command:
sudo docker run hello-world
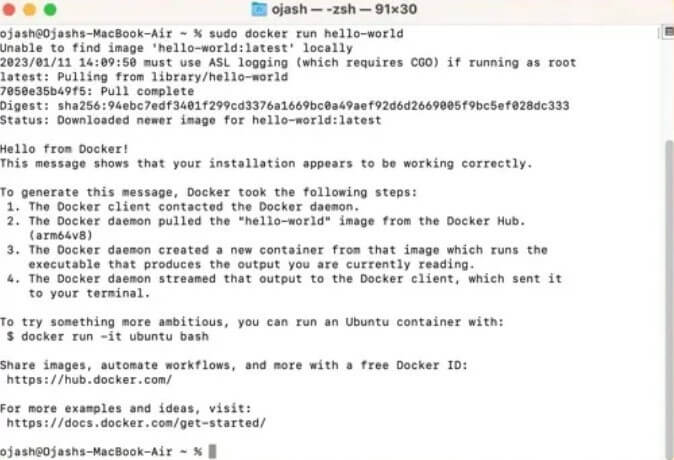
Step 7: If there are no errors, the installation is completed fully.
Method 3: Install via Command Line
It is possible to install Docker on Mac through the command line through the Terminal utility in the Applications folder. This occurs after you complete the Docker.dmg file. This version of accessing the Terminal and using commands to install the software is more complex to handle. So, it is best suited for developers will some technical expertise.
How to do this?
Step 1: Click on Finder > Applications > Utilities > Terminal.
Step 2: Run the next commands one after another and press Enter:
sudo hdiutil attach Docker.dmg
sudo /Volumes/Docker/Docker.app/Contents/MacOS/install
sudo hdiutil detach /Volumes/Docker
Step 3: The macOS system carries out many security checks in the first use of an app. So, the “install” command would not show results instantly.
The “Install” command will accept different flags, like:
–accept-license
–allowed-org=<org name>
–user=<username>
Method 4: How to Install the Docker Desktop Updates on Mac
Docker Desktop does get new updates that users must download and install into their system. When there are newly available updates, the icon for it will appear in the Docker menu. You can access System Preferences > Software Updates to search for any new updates directly.
Adjust the setting to download the software update immediately. Or, tap the Release Notes choice to see the new changes in the updated software available. Users can disable the automatic update checking functionality through Docker Desktop since version 4.3.0.
How to do this?
Step 1: Click on the Docker menu > Download update
to install the latest updates.
Step 2: Click on the Update and Restart option in the next section. The upgrades will start downloading automatically, and the device will reboot after that.
Step 3: Under the Docker Subscription Service Agreement section, read the terms and conditions and tap on Accept.
Conclusion
Indeed, the Docker Desktop is very useful on Mac for building and testing containerized apps for different user types. So, following suitable steps to safely download and install the program is important. The methods mentioned here are detailed and allow for a fast installation process of the software and the new updates later.
Take the time to understand your system specifications and follow the relevant installation commands carefully. In case of complex technical steps, take professional help if needed. Practice all of these methods first.
Author Bio:
Dinesh Lakhwani 

Dinesh Lakhwani, the entrepreneurial brain behind “TechCommuters,” achieved big things in the tech world. He started the company to make smart and user-friendly tech solutions. Thanks to his sharp thinking, focus on quality and the motto of never giving up, TechCommuters became a top player in the industry. His commitment to excellence has propelled the company to a leading position in the industry.
Popular Post


Recent Post
How To Get More Storage On PC Without Deleting Anything [2025]
Running out of space on your PC is frustrating. You might think deleting files is the only way. But that’s not true. There are many ways to get more storage without losing your important data. Learning how to get more storage on PC can save you time and stress. These methods work well and keep […]

How To Speed Up An Old Laptop [Windows 11/10]: Complte Guide
Is your old laptop running slowly? You’re not alone. Many people face this issue as their computers age. Learning how to speed up an old laptop is easier than you think. Over time, older laptops tend to slow down for a variety of reasons. Fortunately, with a few smart tweaks, you can significantly boost their […]

How To Reset Your PC For A Fresh Start In Windows 11/10 [2025]
Is your Windows computer lagging or behaving unpredictably? Are you constantly dealing with system errors, crashes, or sluggish performance? When troubleshooting doesn’t help, performing a full reset might be the most effective way to restore stability. Resetting your PC clears out all installed applications, personal files, and custom settings. It restores the system to its […]

How To Adjust Display Brightness Settings Easily in Windows [2025]
If your screen is overly bright or dim, it can strain your eyes and make tasks uncomfortable. Fortunately, Windows offers simple tools to fine-tune your display brightness. Despite how easy it is, many users aren’t aware of these quick fixes. Windows has many built-in tools to help you. You can change brightness with just a […]
How to Uninstall Problematic Windows Updates Easily [2025]
Learn how to uninstall problematic Windows updates easily. 5 proven methods to fix crashes, boot issues & performance problems. Simple step-by-step guide.

15 Most Essential Windows 11 Privacy And Security Settings [2025]
Learn 15 essential Windows 11 privacy and security settings to protect your data. Master computer privacy settings with simple steps to manage privacy settings effectively.
Rename Your Device For Better Security Windows [Windows 11 & 10]
Learn to rename your device for better security Windows 11 & 10. Simple steps to protect your computer from hackers. Improve privacy and security now.

How To Adjust Display Appearance Settings Easily in Windows 11/10
Learn to adjust display appearance settings easily Windows offers. Simple guide covers brightness, scaling, resolution & multi-monitor setup for better screen experience.

Supercharge Your Productivity: A Solopreneur’s and SMB’s Guide to Mastering Google Workspace with Gemini’
Picture this. It’s Monday morning. You open your laptop. Email notifications flood your screen. Your to-do list has 47 items. Three clients need proposals by Friday. Your spreadsheet crashed yesterday. The presentation for tomorrow’s meeting is half-finished. Sound familiar? Most small business owners live this reality. They jump between apps. They lose files. They spend […]

9 Quick Tips: How To Optimize Computer Performance
Learn how to optimize computer performance with simple steps. Clean hard drives, remove unused programs, and boost speed. No technical skills needed. Start today!