How To Record A Game Clip On Your PC With Game Bar Site
Last updated on June 9th, 2024 at 2:49 am
Introduction:
Recording gameplay is a great way to capture epic gaming moments, share your skills, or create walkthroughs and tutorials. Windows 11 comes with a built-in app called Game Bar that makes it easy to record clips of your gameplay.
In this comprehensive guide, you’ll learn how to record game clips on your PC with the Game Bar site in Windows 11, step-by-step. We’ll cover how to set up and customize the Game Bar, record standard clips and webcam/audio commentary, enable different audio sources, adjust clip length and quality, save clips, and edit or share them.
Whether you’re a casual gamer looking to capture some highlights to share with friends or a budding content creator, this guide will help you master game clip recording on Windows 11 with Game Bar.
Let’s get started!
What is a Game Bar?
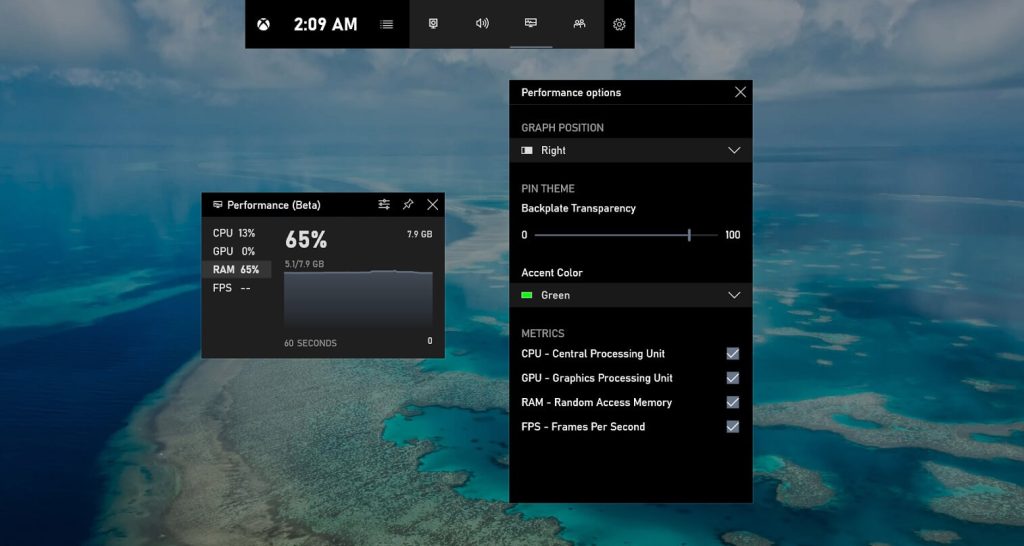
Game Bar is an integrated gaming overlay built into Windows 11 that enables screenshotting, recording gameplay clips, broadcasting gameplay, and monitoring system performance. It provides an easy way to capture gaming highlights without third-party software.
Game Bar can be accessed with the Win + G keyboard shortcut or by clicking its icon in the notification area during gameplay. It gives you controls to start, stop, and customize recordings and includes useful widgets for chatting with friends, monitoring FPS, CPU usage, etc. Game Bar makes recording and sharing your gameplay as simple as pressing a button.
Getting Started: Prerequisites
Before you can start recording game clips, make sure:
- You’re running Windows 11 on your PC.
- Make sure you have the right graphics card and drivers installed.
- Game Bar requires DirectX 12 compatible GPUs and drivers.
- The game you want to record is DirectX 11 or 12 compatible. Game Bar doesn’t work with DirectX 9 or 10 games.
- You’ve enabled Game Mode in Windows Settings. This optimizes your PC for gaming when launching games.
Enabling and Customizing Game Bar
Game Bar is enabled by default in Windows 11, but you can customize it before recording clips. Here’s how:
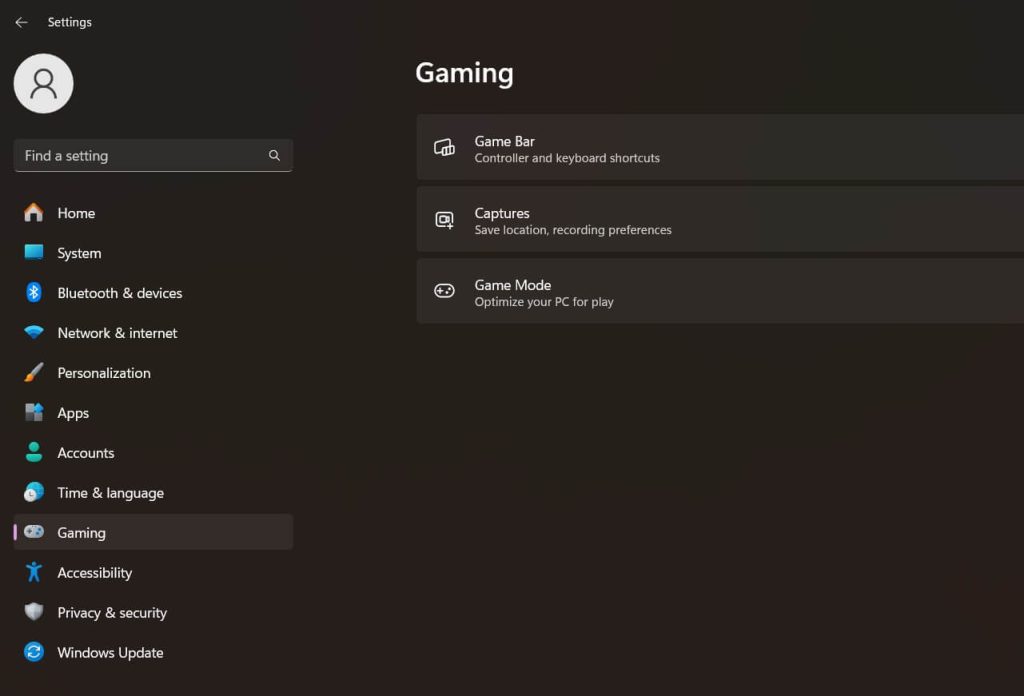
Step 1: Open Settings and go to Gaming > Game Bar.
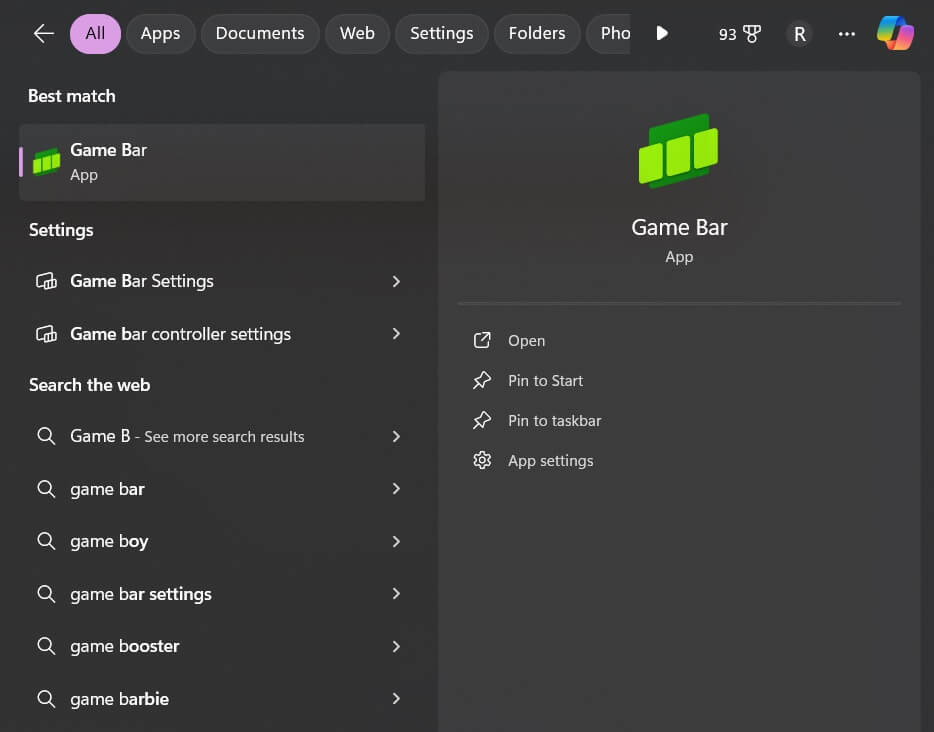
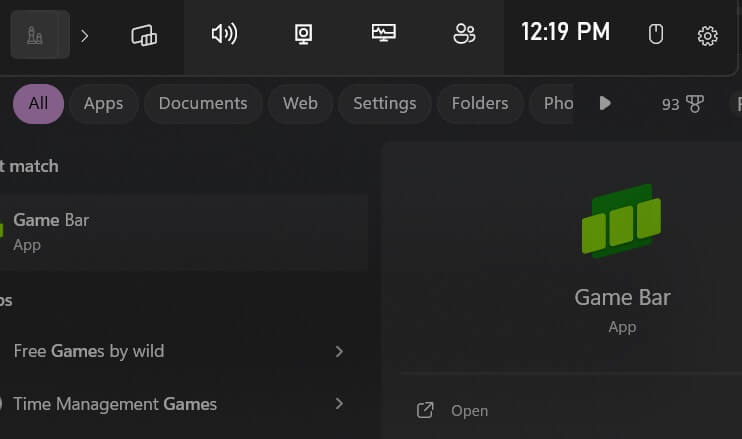
Step 2: After enabling the Game Bar, close the Settings app. Tap on the Windows search bar and type “Game Bar”. Hit Enter.
Step 3: You will now see a Game Bar notification banner on the screen. Select the gear-shaped icon to open “Settings”.
Step 3: Here you can tweak the additional settings. You can even choose your preferred keyboard shortcut. The default is Win + G.
Step 4: Under ‘Show text overlays for’, select which system notifications you want to see as on-screen text during gameplay recordings. Keep it minimal for clean recordings.
Step 5: Explore other options like disabling Game Mode, changing GPU monitoring tools, controlling microphone sources, etc. based on your preferences.
That covers the basics of setting up and customizing Game Bar for gameplay recording. The keyboard shortcut will now open the Game Bar. Next, let’s see how to record game clips.
How To Record A Game Clip On Your PC With Game Bar Site
Here are the steps to record standard gameplay video and audio using Game Bar in Windows 11:
Step 1: Launch the game you want to record and start playing as usual.
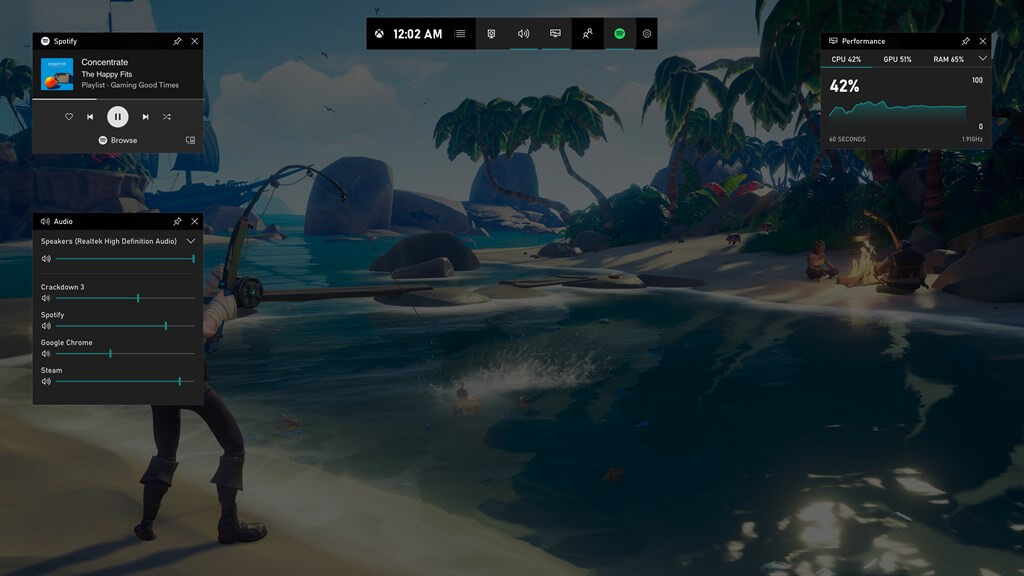
Step 2: When you’re ready to start recording, press the Windows key + G to open the Game Bar. Alternatively, click the Game Bar icon in the notification area. This will help you to record a game clip on your PC with the Game Bar site.
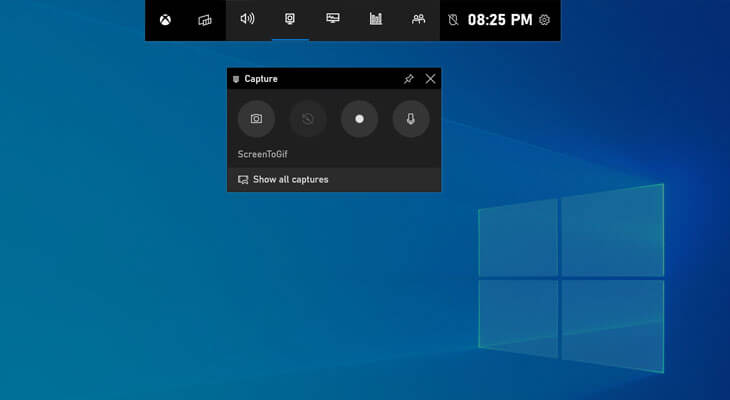
Step 3: In the Game Bar, click on the red dot icon to start recording. A 3-second countdown will begin.
Play naturally. Game Bar will now record video of your gameplay and audio from your mic and the game. The red dot will change to a square icon to indicate that the recording is in progress.
Step 4: To stop recording, open Game Bar again and click on the square stop icon. Your gameplay clip will now be saved automatically in MP4 format to Videos > Captures in File Explorer.
Step 5: The default clip length is 30 seconds, but you can set this to up to 5 minutes in Game Bar settings. Captured clips include game audio and microphone audio if enabled. Now let’s look at recording commentary over your gameplay.
Recording Gameplay with Webcam and Microphone
To add webcam video and microphone commentary to your gameplay clips:
Step 1: Follow steps 1-3 in the above section to start a standard gameplay clip recording.
Step 2: In the Game Bar, click on the webcam icon. Choose your webcam and microphone. Adjust settings as needed.
Step 3: Position the webcam overlay on the screen. Click Start to add a webcam.
Step 4: Your camera feed will be added to the top of the game footage. Provide commentary through your microphone naturally as you record gameplay.
Step 5: Stop recording when done. The clip will include simultaneous webcam and game footage, with microphone audio.
With this method, you can add your live commentary to make engaging, tutorial-style game clips. You can enable mic-only audio if you don’t need the webcam. Next, we’ll see how to record clips with separate game and mic audio channels.
Recording Gameplay with Separate Audio Channels
Game Bar allows recording gameplay and microphone on separate audio channels:
Step 1: In Windows Settings > System > Sound, set your microphone as the Default Communication Device.
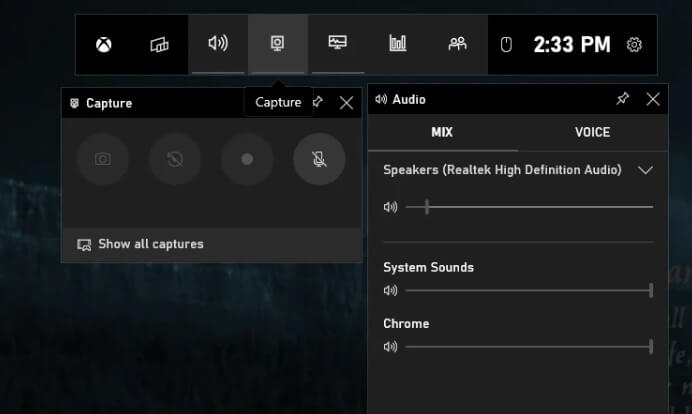
Step 2: Open the Game Bar during gameplay. Go to Settings > Microphone and set it to Communications Device Only.
Step 3: Start recording gameplay as usual. Your mic audio will be recorded separately from the game audio.
Step 4: Stop recording when done. The saved clip will have 2 audio channels – one with pure game audio, and the other with just your mic audio.
This allows you to edit the levels of the game and microphone audio independently when post-processing your clips in video editors. Next, let’s look at adjusting the clip resolution and quality.
How to Change Clip Resolution and Quality in Game Bar
Follow these steps to change the resolution, frame rate, and bitrate settings for your game clips in the Game Bar:
Step 1: In the Game Bar during gameplay, click on the Settings icon.
Step 2: Go to the Captures tab. Set Clip resolution to your preferred value like 1080p, 1440p, etc.
Under the Frame rate, choose 30 or 60fps based on your preference.
Step 3: For Bitrate, pick a value between 10-50Mbps. Higher values mean better quality but larger file sizes.
Step 4: Start recording gameplay. Your clips will now use the settings you configured.
For best results, choose a resolution that matches your game and monitor. 60fps gives smoother video, while 30fps saves space. Finding the right bitrate balance optimizes quality and file size.
The default settings work fine, but adjusting the capture parameters gives you more control over the clip output. Next, we’ll see how to save and access your recordings.
Saving and Accessing Your Recorded Clips
Gameplay clips recorded with Windows 11’s Game Bar are saved automatically with the following method:
- Video format: MP4
- Location: Videos > Captures folder in File Explorer
- Filename: Name of game followed by date and time
For example, a clip from Fortnite recorded on February 20, 2023, at 3:15 pm would be saved as Fortnite_2023.02.20_15.15.mp4
Your clips get saved locally on your PC’s storage drive. You can access them easily:
- Open File Explorer and go to Videos > Captures folder.
- Open the Xbox app. Go to Captures > Game DVR.
In the Game Bar, click on the Latest Captures icon in the sidebar to view and manage clips.
From here, you can watch your recordings, rename files, delete unwanted clips, or export them elsewhere for editing and sharing. Speaking of editing, let’s look at how to polish your game clips.
Editing and Sharing Your Recorded Game Clips
To take your game recordings to the next level, consider editing them in a video editor before sharing them online:
- Use software like Adobe Premiere to trim unwanted footage, add transitions, insert captions, adjust colors, etc.
- Add effects like green screen, creative crop, zoom animations, etc. to highlight moments.
- Use tools like DaVinci Resolve to split and edit the game and mic audio channels separately.
- Add your webcam footage if you recorded your commentary. Sync it with the gameplay visuals.
- Export the edited clip and share it online on YouTube, TikTok, Twitter, etc.
With some creative editing, you can transform raw game captures into professional-looking gameplay montages and tutorial videos ready to share online and impress your viewers!
Advanced Tips to Use Game Bar on Windows 11
Here are some quick pro tips to further master Game Bar game clip recording in Windows 11:
- Use keyboard shortcuts in the Game Bar to start, stop recordings, and toggle the webcam instead of clicking icons.
- Use the Xbox app to change Game DVR settings like auto-capturing kills and Nvidia Highlights.
- Disable limiting background capture rate or GPU capture resolution in Game Bar settings for optimal quality.
- Capture your on-screen cursor by enabling it in Game Bar settings for tutorials and strategy videos.
- Use the Xbox Accessories app to remap the Xbox controller’s Share button to instantly save Game Bar clips.
Wrapping Up
This wraps up our guide on how to record a game clip on your PC with Game Bar site. So, that covers everything you need to record smooth, professional-looking gameplay clips using the built-in Game Bar app in Windows 11. With its intuitive interface, customizable settings, webcam integration, independent audio channels, and editing options, you have all the tools to create amazing game recordings ready to share.
So open up your favorite games, hit that Windows + G shortcut, and start capturing and sharing your most epic gaming moments with Game Bar on Windows 11 today!
FAQs:
Q: What are the minimum system requirements for using Game Bar?
Game Bar requires Windows 11 and a DirectX 12 compatible GPU and graphics driver. Older DirectX 9 and 10 GPUs are not supported. Your PC should meet at least the minimum Windows 11 system requirements for a smooth recording experience.
Q: Does Game Bar work with all PC games?
No. Game Bar can only record gameplay video for games that use DirectX 11 or DirectX 12. Older DirectX 9 and 10 games are incompatible. Most modern PC game titles work fine, but some older games won’t record correctly.
Q: How do I change the keyboard shortcut to open Game Bar?
You can customize the shortcut to open the Game Bar by going to Settings > Gaming > Game Bar and changing the ‘Open Game Bar using’ setting. The default shortcut is Windows key + G. You can change it to any other key combination that’s easy for you to use while gaming.
Author Bio:
Dinesh Lakhwani 

Dinesh Lakhwani, the entrepreneurial brain behind “TechCommuters,” achieved big things in the tech world. He started the company to make smart and user-friendly tech solutions. Thanks to his sharp thinking, focus on quality and the motto of never giving up, TechCommuters became a top player in the industry. His commitment to excellence has propelled the company to a leading position in the industry.
Popular Post

Recent Post
How To Get More Storage On PC Without Deleting Anything [2025]
Running out of space on your PC is frustrating. You might think deleting files is the only way. But that’s not true. There are many ways to get more storage without losing your important data. Learning how to get more storage on PC can save you time and stress. These methods work well and keep […]

How To Speed Up An Old Laptop [Windows 11/10]: Complte Guide
Is your old laptop running slowly? You’re not alone. Many people face this issue as their computers age. Learning how to speed up an old laptop is easier than you think. Over time, older laptops tend to slow down for a variety of reasons. Fortunately, with a few smart tweaks, you can significantly boost their […]
How To Reset Your PC For A Fresh Start In Windows 11/10 [2025]
Is your Windows computer lagging or behaving unpredictably? Are you constantly dealing with system errors, crashes, or sluggish performance? When troubleshooting doesn’t help, performing a full reset might be the most effective way to restore stability. Resetting your PC clears out all installed applications, personal files, and custom settings. It restores the system to its […]

How To Adjust Display Brightness Settings Easily in Windows [2025]
If your screen is overly bright or dim, it can strain your eyes and make tasks uncomfortable. Fortunately, Windows offers simple tools to fine-tune your display brightness. Despite how easy it is, many users aren’t aware of these quick fixes. Windows has many built-in tools to help you. You can change brightness with just a […]
How to Uninstall Problematic Windows Updates Easily [2025]
Learn how to uninstall problematic Windows updates easily. 5 proven methods to fix crashes, boot issues & performance problems. Simple step-by-step guide.
15 Most Essential Windows 11 Privacy And Security Settings [2025]
Learn 15 essential Windows 11 privacy and security settings to protect your data. Master computer privacy settings with simple steps to manage privacy settings effectively.
Rename Your Device For Better Security Windows [Windows 11 & 10]
Learn to rename your device for better security Windows 11 & 10. Simple steps to protect your computer from hackers. Improve privacy and security now.

How To Adjust Display Appearance Settings Easily in Windows 11/10
Learn to adjust display appearance settings easily Windows offers. Simple guide covers brightness, scaling, resolution & multi-monitor setup for better screen experience.

Supercharge Your Productivity: A Solopreneur’s and SMB’s Guide to Mastering Google Workspace with Gemini’
Picture this. It’s Monday morning. You open your laptop. Email notifications flood your screen. Your to-do list has 47 items. Three clients need proposals by Friday. Your spreadsheet crashed yesterday. The presentation for tomorrow’s meeting is half-finished. Sound familiar? Most small business owners live this reality. They jump between apps. They lose files. They spend […]
9 Quick Tips: How To Optimize Computer Performance
Learn how to optimize computer performance with simple steps. Clean hard drives, remove unused programs, and boost speed. No technical skills needed. Start today!