
10 Ways to Resolve the No Battery is Detected Error on Windows 11

Last updated on September 2nd, 2023 at 4:16 am
Introduction
People can use a wide range of features and applications for an optimized user experience on Windows 11. However, the system is still prone to specific problems like errors and bugs. One specific issue that is highly distracting for users is the “no battery is detected” error prompt.
As for fixing the battery detection problem, here you will learn the main solutions you can utilize instead.
Top Fixes for the No Battery Detected Error
Users can try out different methods to repair the battery condition. Besides troubleshooting no battery detected problem, you can make other changes to your device hardware and software functions. For an easier problem, we have listed the top 10 ways we tried out for solving this error with apparent success.
Solution 1: Quick hardware-based fixes to try
You can try some actions to repair your laptop’s functionality in case of the “no battery is detected” issue. Often, the cause is due to bad placement of the battery, dirt within the device, or excess system heating. You can use specific steps to rectify these small-scale issues.
- Restart the laptop system– You can directly restart the device to fix the battery detection problem. Go to the Windows icon on the Taskbar on the Home Screen, click on the Power icon, and select the restart button. In many cases, the device picks up battery status information when the device switches on again.
- Clean out battery area– Sometimes, the system does not detect the battery in the device since the battery compartment is not well-cleaning. So, you should shut off your device and manually clean the battery compartment.
- Cool the PC system– Computer devices like laptops can get overheated batteries when they leave their device near any heat source or out under the sun. Let the device rest for some time to cool the internal components slowly to fix this.
- Put the battery again after a fall- Sometimes, the “no battery is detected” message appears after the user drops their device, which displaces the battery placement. Opening and reconnecting the battery can fix the issue. If it does not work, try the other software-based troubleshooting processes.
Solution 2: Do a full Power Cycle scan
If the “no battery is detected” prompt still appears after reconnecting the battery, you should run a total power cycle. With this method, any residual power present in the capacitor will discharge and return the device to the temporary configurations. Windows will scan the complete system and then rectify the battery problem.
How to do this?
Step 1: Shut the laptop off from the power button on the device.
Step 2: Unplug every connected external device and remove the battery.
Step 3: Press down on the power button and hold for 15 seconds approximately.
Step 4: Put the battery in the compartment again and boot the laptop up.
Step 5: Plug the power cord back on and turn the device on to see if the fix worked.
Solution 3: Use the Windows 11 Power Troubleshooter
There are troubleshooting solutions for all utilities available on Windows 11 devices. So, troubleshooting no battery detected error is possible through the Power troubleshooter. It checks the in-built battery for any issues and automatically resolves the problems.
How to do this?
Step 1: Click on the Start button and then type the term “Troubleshooter settings” into the given text field. Choose the first search result and then press Enter.
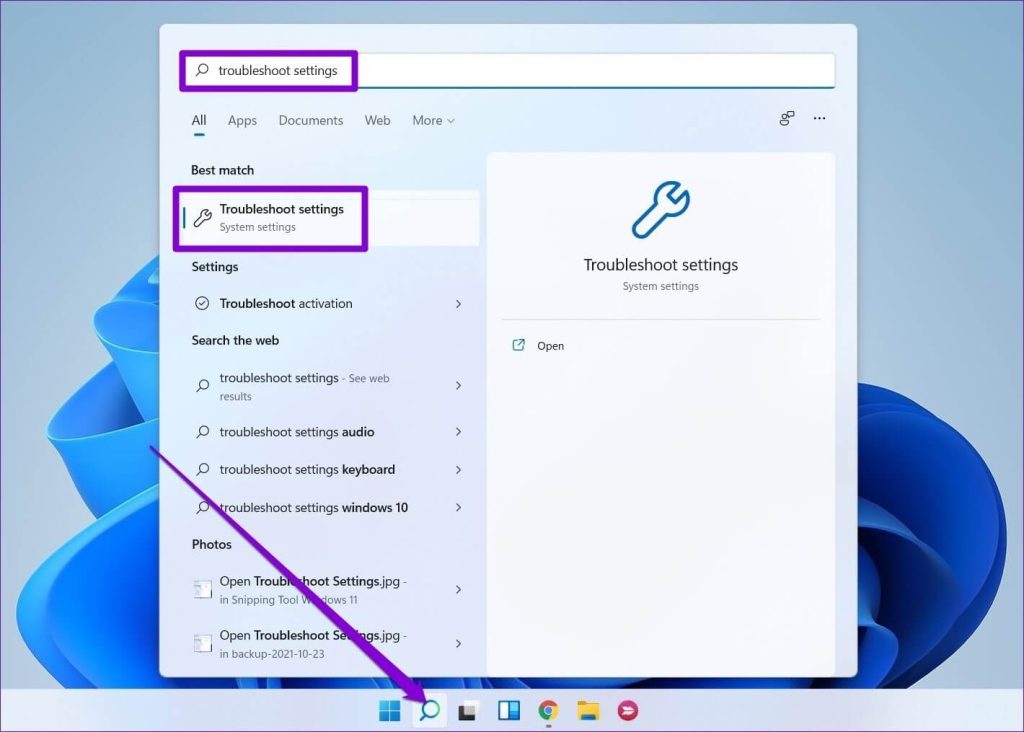
Step 2: Scroll to the “Other troubleshooters” option and click on it.
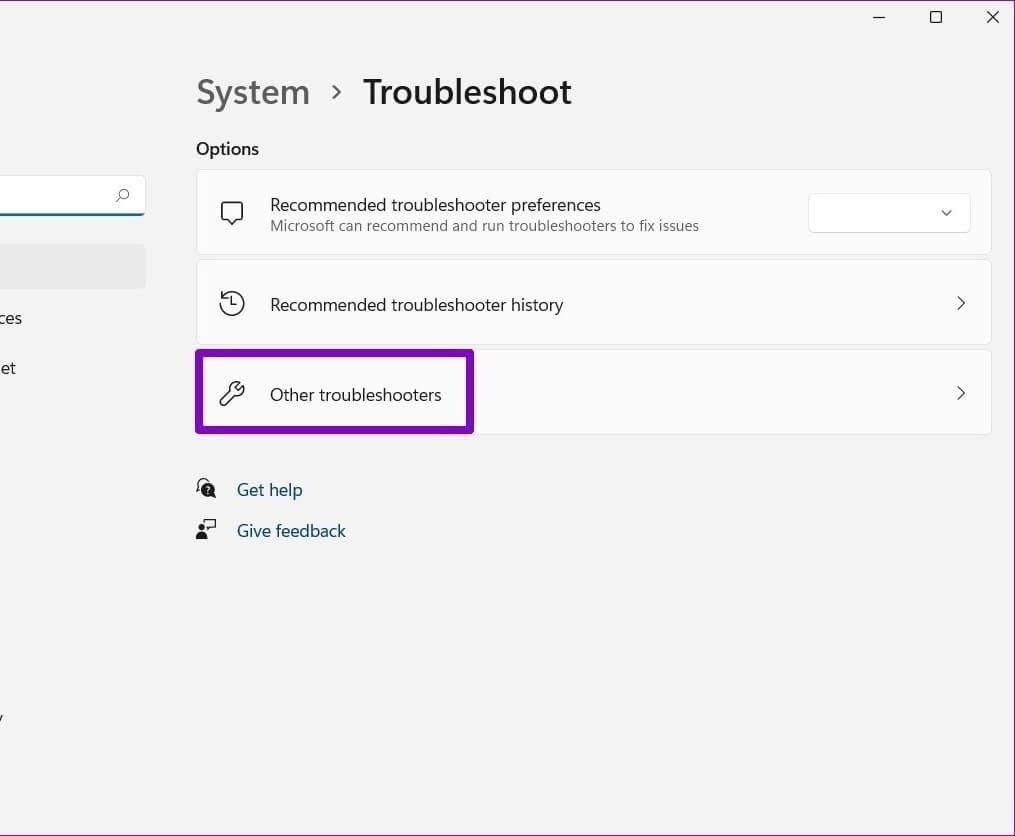
Step 3: On the side of the Power icon, the Run button is placed- press that.
Step 4: After running this sequence, see if the battery error is fixed or not.
Solution 4: Activate Battery through the Device Manager
Sometimes, the error of “no battery is detected” occurs due to a disabled battery setting. You should check the battery status through the Device Manager. There, make the right steps to enable battery functions again.
How to do this?
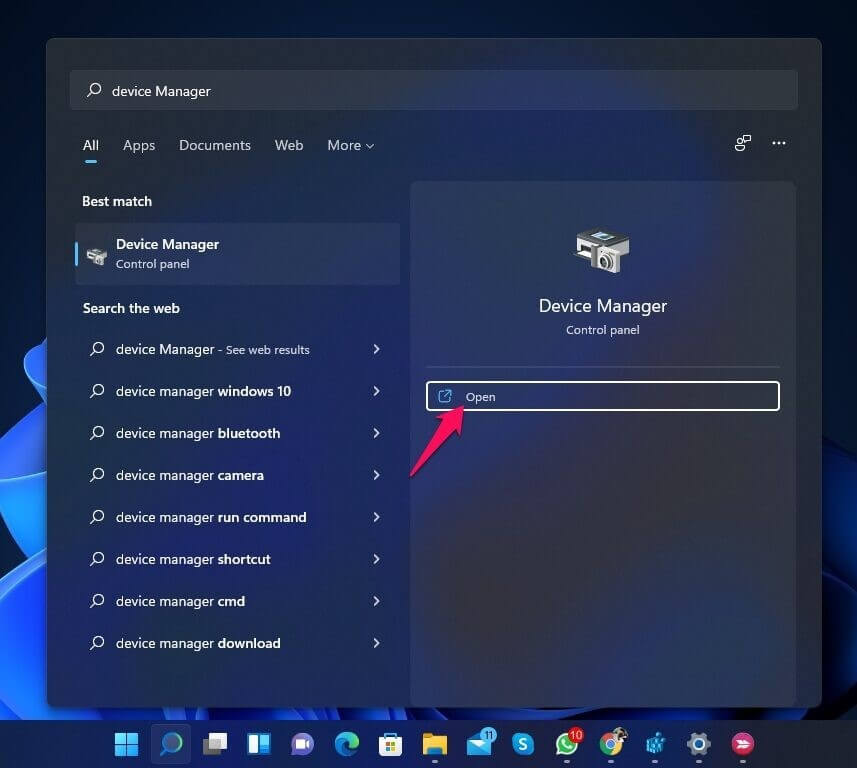
Step 1: Press the Start button on the Taskbar and search for “Device Manager” through the search section.
Step 2: Choose the first app option, and click on it to open.
Step 3: After opening this menu, click the “Batteries” option from the list.
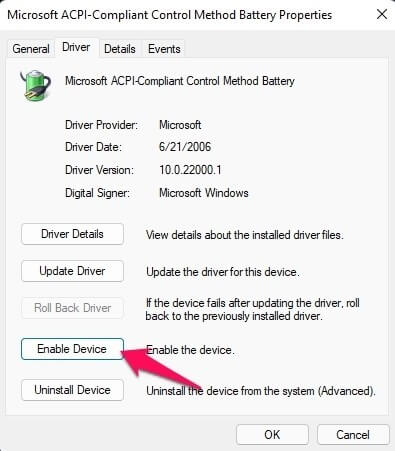
Step 4: Choose the “Microsoft ACPI-Compliant Control Method Battery” option.
Step 5: After that, open the Driver tab and choose “Enable Device” in the pop-up menu. Press OK.
Step 6: Restart the device to check if the solution worked.
Solution 5: Enable the Battery Adapter Again
Typically, battery drivers in Windows are what connect to Windows 11 and link the system with the battery. If the drivers stop working properly, a device’s operating system cannot detect the presence of the battery or its functions. Here, you can disable the adapter for the battery and put it again- this can reactivate the regular driver functions.
How to do this?
Step 1: Through the Windows/Start icon on the Taskbar, type in “Device Manager” and open the app.
Alternatively, you can right-click on top of the Windows icon and click on “Device Manager” from the drop-down list.
Step 2: Under the Device Manager tab, find the “Batteries” option and double-click on it.
Step 3: After expanding it, choose the “Battery adapter” option and right-click on it. Then, press the Disable Device option.
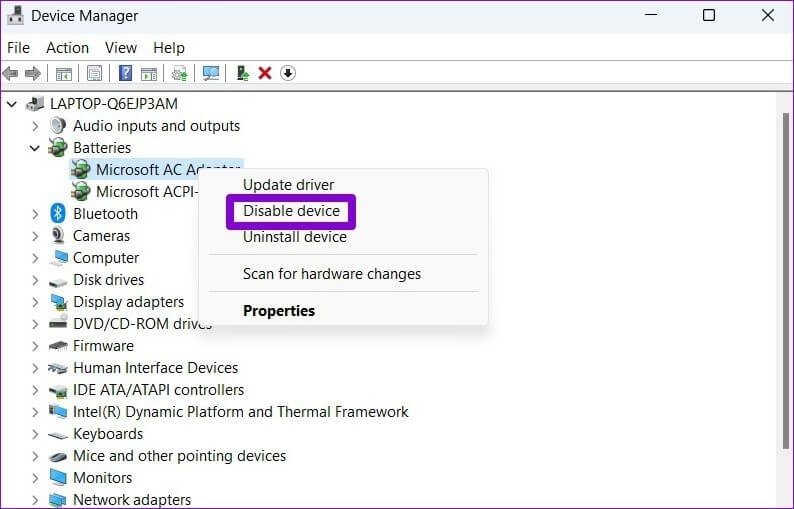
Step 4: After a few seconds, repeat the step again and choose “Enable Device” this time.
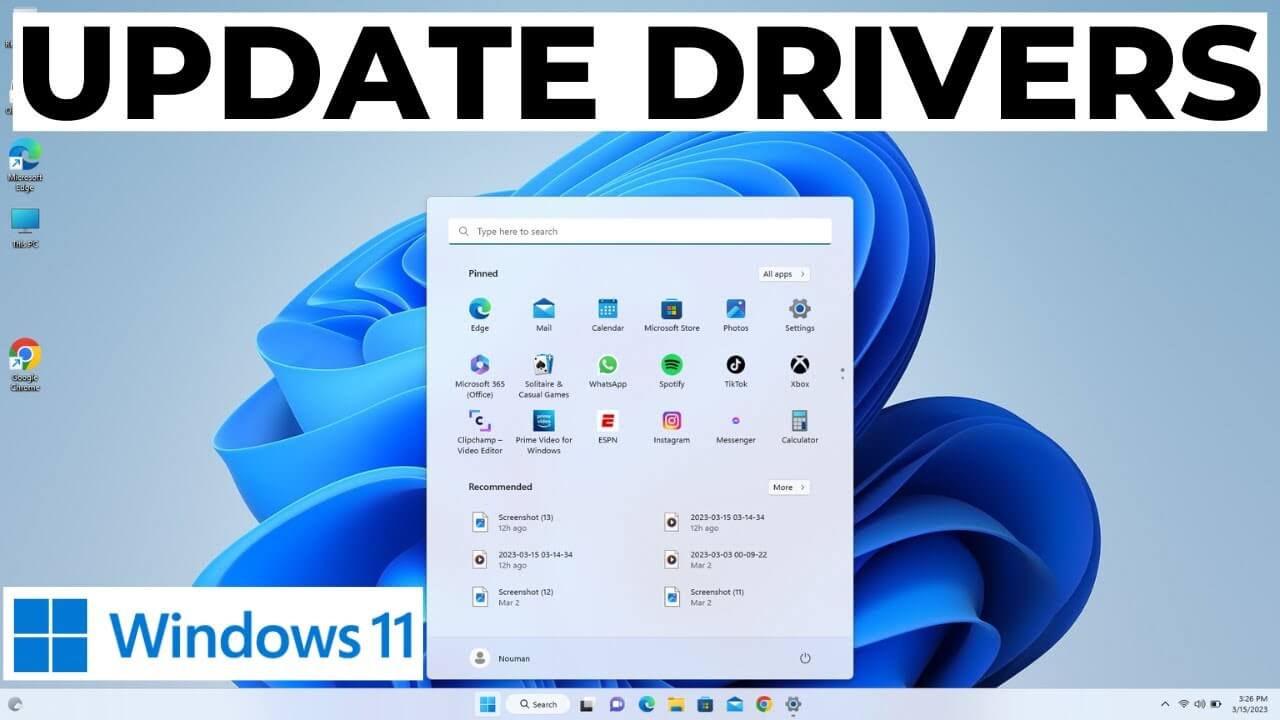
Solution 6: Update the Device’s Battery Drivers
If the device you are using has corrupted or outdated drivers, it can affect the steady functioning of the laptop, like detecting the battery. So, you should check and update the battery drivers in your laptop with the right steps. To note, you can also use Iobit Driver Booster 9 Free to scan and automatically update missing drivers on your device.
How to do this?
Step 1: Press the Start button and type “Device Manager”- double-click on the first result to open it.
Step 2: Click your cursor on Batteries > Microsoft ACPI-Compliant Control Method Battery.
Step 3: Under this pop-up window, choose the Driver tab and press the “Update Driver” button next. Click on the OK button.
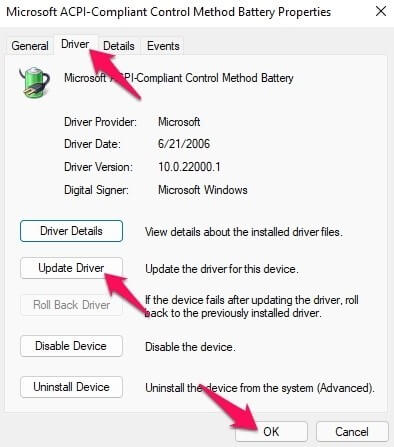
Step 4: Restart the device again.
Solution 7: Roll Back the Battery Drivers
Updating the battery drivers in the laptop can fix the error of no battery being detected. However, some users still notice the problem afterward. It would help if you rolled back your device drivers to the past version since it is not compatible with the newer one.
How to do this?
Step 1: Go to Start > Device Manager > Open.
Step 2: Click on the Batteries option from the list in this window and choose the “Microsoft ACPI-Compliant Control Method Battery” option.
Step 3: Under this selection, choose the Driver tab and press the “Roll Back Driver” option.
Step 4: Restart the laptop after this and then check again.
Solution 8: Update the Windows 11 BIOS
The BIOS (Basic Input Output System) is a robust PC device software that controls the system booting functions. In some devices, the BIOS may not be up-to-date with the current OS installed. Or the software may have defects. That causes issues in the system functions, like no battery detection.
In these cases, it is important to update the BIOS and avoid the problem.
How to do this?
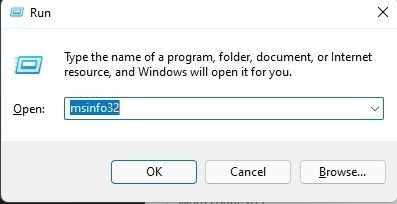
Step 1: Press the Win + R key on your laptop keyboard. The Run dialog box would open.
Step 2: Type the term “msinfo32” in the text field and press OK.
Step 3: Scroll down the list that comes up and find information like the BIOS manufacturer’s identity under the “BIOS Version/Date” section.
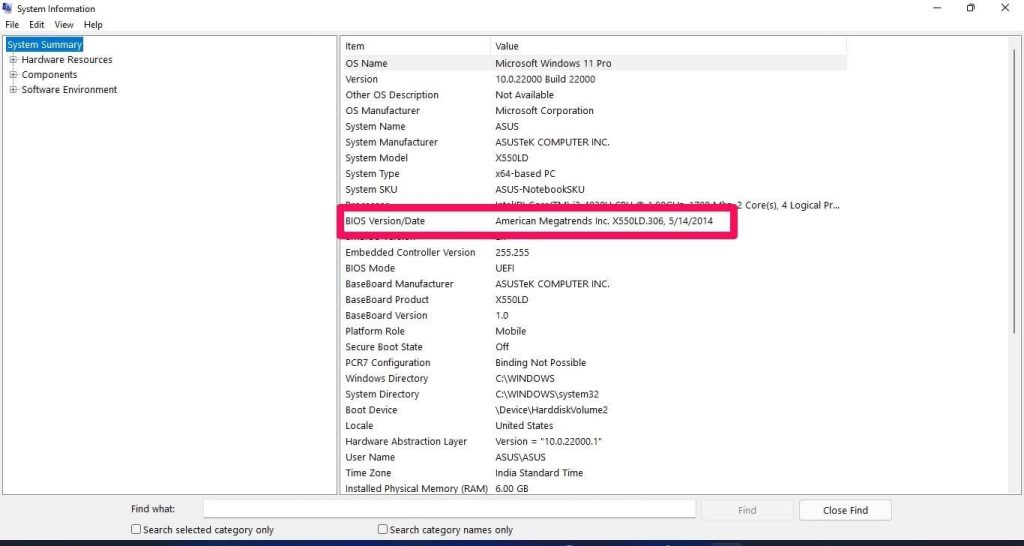
Step 4: Access the manufacturer’s official website and download the recent BIOS updates.
Step 5: Install them into your device and restart the system.
Solution 9: Reset BIOS
For some users, the no battery detected issue in Windows 11 happens after one does the BIOS update. This occurs due to compatibility problems, and you must reset it to the default functions to rectify the issue.
How to do this?
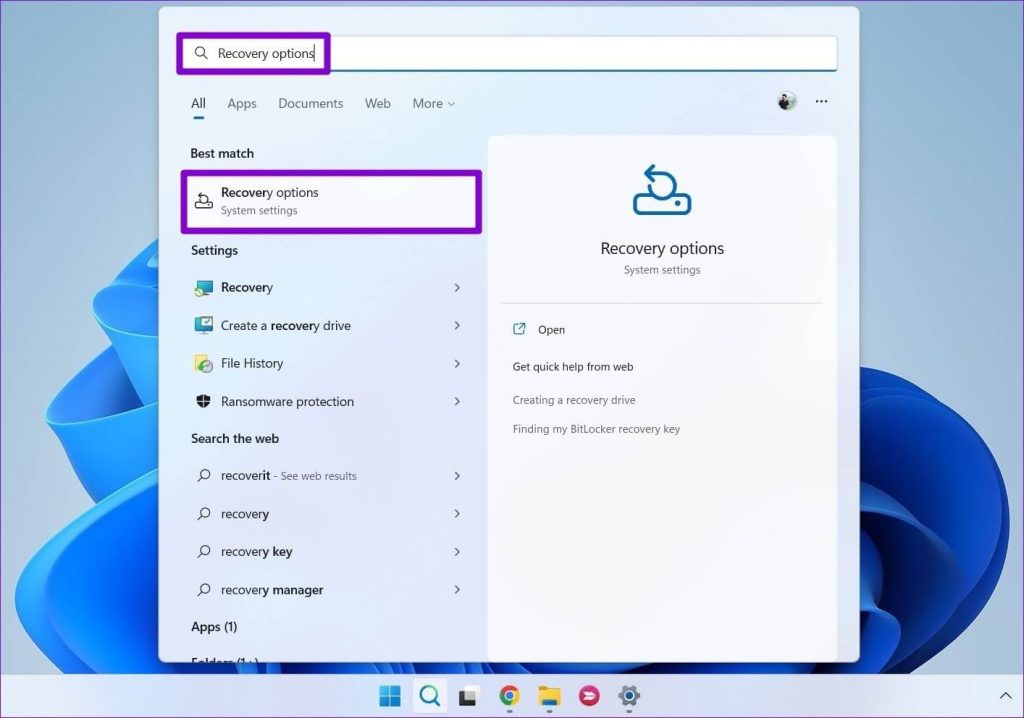
Step 1: Press the Win + S key on your keyboard to access the Search menu easily. Or, directly click on the Windows/Start icon via Taskbar.
Type the term “Recovery options” in the search field. Press Enter.
Step 2: Go to the “Advanced Startup” option and click the “Restart Now” button beside it.
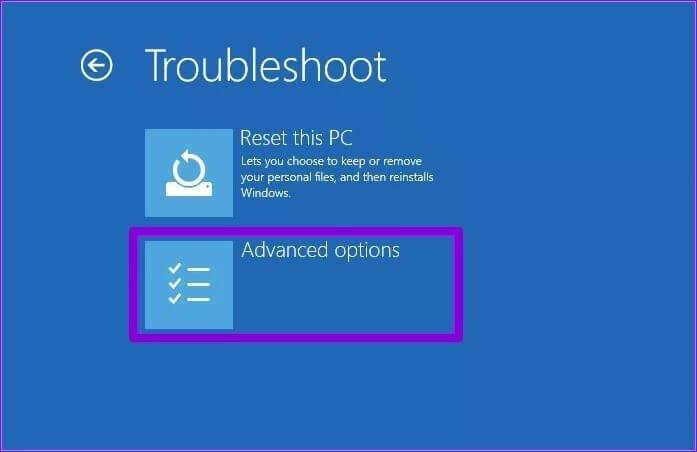
Step 3: Choose the Troubleshoot option.
Step 4: Then, access the “Advanced Options” section.
Step 5: You should click on the “UEFI Firmware Settings” under this window.
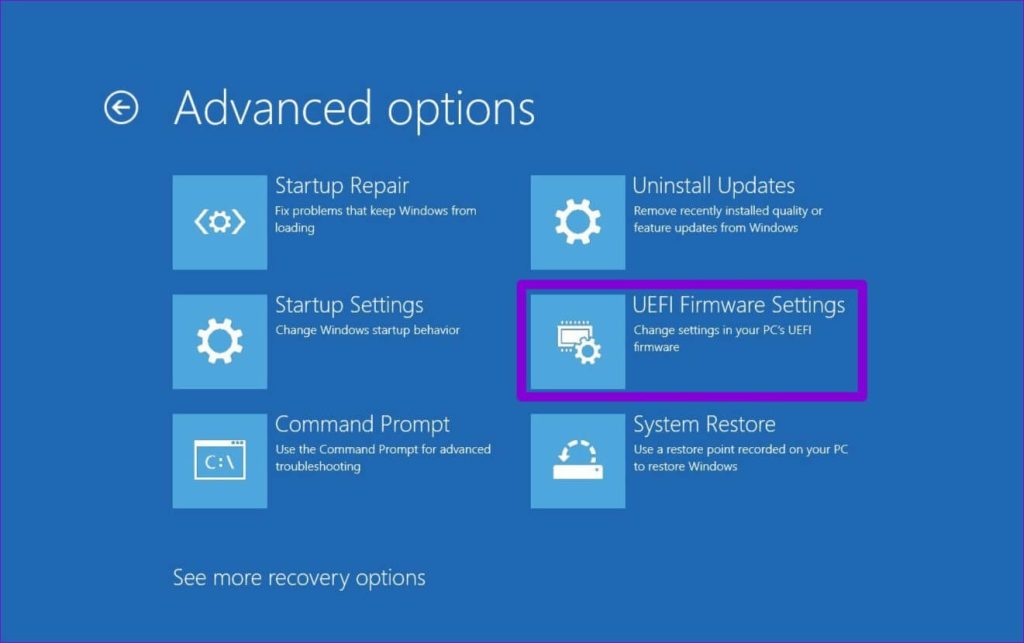
Step 6: In the next window, press the Restart button, and the device will start booting into the BIOS software. This setting can appear in different manners as per device model type.
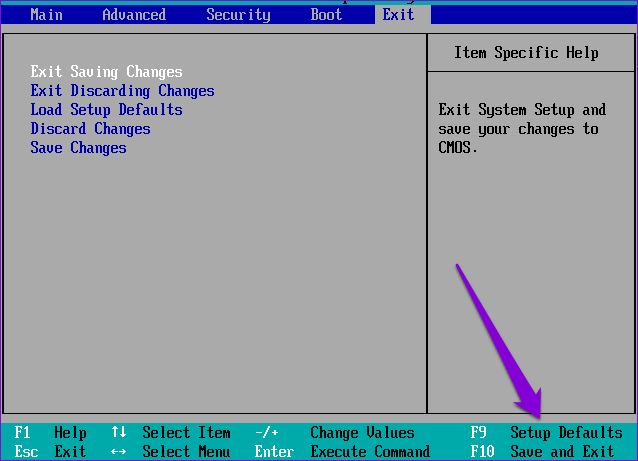
Step 7: After entering the BIOS system, press the F9 key on your keyboard to open Setup Defaults. Press the Yes option.
Step 8: Press the F10 key and exit the BIOS after the changes are saved. Restart the device again.
Solution 10: Update Windows OS
If none of the other solutions work, the problem can be due to the outdated software structure of the Windows OS itself. Typically, the operating system gets automated updates, but that can differ for some users who have done specific system configuration changes.
You can update the OS through the Start Menu and open Settings > Windows Update. In this window, press the “Check for updates” button. After the system finds the new updates, press Install now. Typically, it happens automatically.
Conclusion
There are many methods users can try out to fix the error of no battery detection on their Windows 11 devices. Consider the main problem, such as the lack of updated drivers or the presence of faulty ones. Then, carry out the respective solution. You can also benefit from advanced software like Iobit Driver Booster 9 Free to automatically find damaged/missing drivers and fix the issue.
Carefully follow these steps on your device to fix the error, although some steps may appear differently based on the device model type. Let us know if you have any doubts.
Author Bio:
Dinesh Lakhwani 

Dinesh Lakhwani, the entrepreneurial brain behind “TechCommuters,” achieved big things in the tech world. He started the company to make smart and user-friendly tech solutions. Thanks to his sharp thinking, focus on quality and the motto of never giving up, TechCommuters became a top player in the industry. His commitment to excellence has propelled the company to a leading position in the industry.
Popular Post


Recent Post
How To Get More Storage On PC Without Deleting Anything [2025]
Running out of space on your PC is frustrating. You might think deleting files is the only way. But that’s not true. There are many ways to get more storage without losing your important data. Learning how to get more storage on PC can save you time and stress. These methods work well and keep […]

How To Speed Up An Old Laptop [Windows 11/10]: Complte Guide
Is your old laptop running slowly? You’re not alone. Many people face this issue as their computers age. Learning how to speed up an old laptop is easier than you think. Over time, older laptops tend to slow down for a variety of reasons. Fortunately, with a few smart tweaks, you can significantly boost their […]
How To Reset Your PC For A Fresh Start In Windows 11/10 [2025]
Is your Windows computer lagging or behaving unpredictably? Are you constantly dealing with system errors, crashes, or sluggish performance? When troubleshooting doesn’t help, performing a full reset might be the most effective way to restore stability. Resetting your PC clears out all installed applications, personal files, and custom settings. It restores the system to its […]

How To Adjust Display Brightness Settings Easily in Windows [2025]
If your screen is overly bright or dim, it can strain your eyes and make tasks uncomfortable. Fortunately, Windows offers simple tools to fine-tune your display brightness. Despite how easy it is, many users aren’t aware of these quick fixes. Windows has many built-in tools to help you. You can change brightness with just a […]
How to Uninstall Problematic Windows Updates Easily [2025]
Learn how to uninstall problematic Windows updates easily. 5 proven methods to fix crashes, boot issues & performance problems. Simple step-by-step guide.

15 Most Essential Windows 11 Privacy And Security Settings [2025]
Learn 15 essential Windows 11 privacy and security settings to protect your data. Master computer privacy settings with simple steps to manage privacy settings effectively.
Rename Your Device For Better Security Windows [Windows 11 & 10]
Learn to rename your device for better security Windows 11 & 10. Simple steps to protect your computer from hackers. Improve privacy and security now.

How To Adjust Display Appearance Settings Easily in Windows 11/10
Learn to adjust display appearance settings easily Windows offers. Simple guide covers brightness, scaling, resolution & multi-monitor setup for better screen experience.

Supercharge Your Productivity: A Solopreneur’s and SMB’s Guide to Mastering Google Workspace with Gemini’
Picture this. It’s Monday morning. You open your laptop. Email notifications flood your screen. Your to-do list has 47 items. Three clients need proposals by Friday. Your spreadsheet crashed yesterday. The presentation for tomorrow’s meeting is half-finished. Sound familiar? Most small business owners live this reality. They jump between apps. They lose files. They spend […]
9 Quick Tips: How To Optimize Computer Performance
Learn how to optimize computer performance with simple steps. Clean hard drives, remove unused programs, and boost speed. No technical skills needed. Start today!